157_data_sending_to_Cumulocity (IoT)

Cumulocityのドキュメントに従ってこの手順通りでやってみる。
参考Webはここ。
https://cumulocity.com/guides/rest/introduction/
私の設定情報は下記。そのまま掲載。
—————-
設定情報
—————-
https://iot05.cumulocity.com
Username : yoshihara20161226
Password : A******
System ID:***** (←★これはcumulocity見て確認需重要!!★)
Name :RaspPi BCM2709 0000000075b****f
Model:RaspPi BCM2709
Serial number:0000000075b****f
Revision :a02082
Type:c8y_Serial
Id:linux-0000000075b****f
Firmware version :mhf
—————-
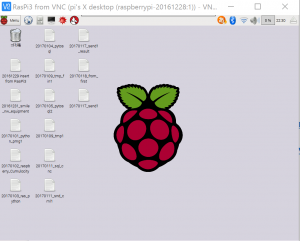
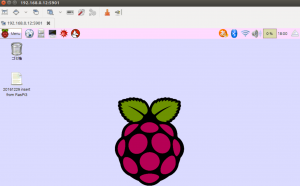
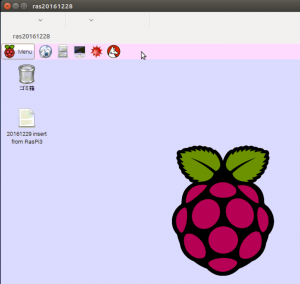
さて、まずVNCで接続して、、、、RaspberryPi君!ようこそ!
(図1)
Cumulocityにも接続します。自分のOD、Passで!
(図2)
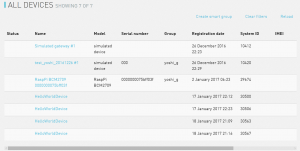
DevicemanagementでAll devicesを選択。一覧表示。
(図3)
DeveieResistrationは特にやらなくとも、RaspberryPiを一度接続したら勝手に認識したなあ。。。ここは別途要確認。。
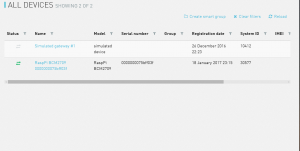
これは、あえてシリアル番号入れて登録した画面。
(図4)
少し時間たつと、勝手にRaspberryPiの情報を送受した??別途要確認。。。
(図5)
ここから、、、
(#1 send)DeviceCreateをする。コマンドは、下記。Linuxでcurlコマンドで。cumulocityへ投げつける。
$ curl -v -u yoshihara20161226:A****** \
>    -H ‘Accept: application/vnd.com.nsn.cumulocity.managedObject+json; charset=UTF-8; ver=0.9’ \
>    -H ‘Content-type: application/vnd.com.nsn.cumulocity.managedObject+json; charset=UTF-8; ver=0.9’ \
>    -X POST \
>    -d ‘{“c8y_IsDevice”:{},”name”:”HelloWorldDevice”}’ \
>    https://iot05.cumulocity.com/inventory/managedObjects
(#1 results)
すると、下記のresponceが返ってくる。中ほどの”HTTP/1.1 201 Created”があれば多分コマンドはうまく行ったはず。。。。
(図6)
* Hostname was NOT found in DNS cache
*   Trying 52.28.26.32…
* Connected to iot05.cumulocity.com (52.28.26.32) port 443 (#0)
* successfully set certificate verify locations:
*   CAfile: none
CApath: /etc/ssl/certs
* SSLv3, TLS handshake, Client hello (1):
* SSLv3, TLS handshake, Server hello (2):
* SSLv3, TLS handshake, CERT (11):
* SSLv3, TLS handshake, Server key exchange (12):
* SSLv3, TLS handshake, Server finished (14):
* SSLv3, TLS handshake, Client key exchange (16):
* SSLv3, TLS change cipher, Client hello (1):
* SSLv3, TLS handshake, Finished (20):
* SSLv3, TLS change cipher, Client hello (1):
* SSLv3, TLS handshake, Finished (20):
* SSL connection using TLSv1.2 / ECDHE-RSA-AES256-GCM-SHA384
* Server certificate:
*   subject: C=DE; ST=Nordrhein-Westfalen; L=Duesseldorf; O=Cumulocity GmbH; CN=*.cumulocity.com
*   start date: 2016-08-01 09:55:38 GMT
*   expire date: 2017-08-05 10:35:38 GMT
*   subjectAltName: iot05.cumulocity.com matched
*   issuer: C=US; ST=Arizona; L=Scottsdale; O=GoDaddy.com, Inc.; OU=http://certs.godaddy.com/repository/; CN=Go Daddy Secure Certificate Authority – G2
*   SSL certificate verify ok.
* Server auth using Basic with user ‘yoshihara20161226’
> POST /inventory/managedObjects HTTP/1.1
> Authorization: Basic eW9zaGloYXJhMjAxNjEyMjY6QWExMjM0NTY=
> User-Agent: curl/7.38.0
> Host: iot05.cumulocity.com
> Accept: application/vnd.com.nsn.cumulocity.managedObject+json; charset=UTF-8; ver=0.9
> Content-type: application/vnd.com.nsn.cumulocity.managedObject+json; charset=UTF-8; ver=0.9
> Content-Length: 45
>
* upload completely sent off: 45 out of 45 bytes
< HTTP/1.1 201 Created
* Server nginx is not blacklisted
< Server: nginx
< Date: Tue, 17 Jan 2017 13:23:11 GMT
< Content-Type: application/vnd.com.nsn.cumulocity.managedObject+json; charset=UTF-8; ver=0.9
< Transfer-Encoding: chunked
< Connection: keep-alive
< Location: https://iot05.cumulocity.com/inventory/managedObjects/30506
< Strict-Transport-Security: max-age=31536000; includeSubDomains
<
* Connection #0 to host iot05.cumulocity.com left intact
{“assetParents”:{“references”:[],”self”:”https://iot05.cumulocity.com/inventory/managedObjects/30506/assetParents”},”childAssets”:{“references”:[],”self”:”https://iot05.cumulocity.com/inventory/managedObjects/30506/childAssets”},”childDevices”:{“references”:[],”self”:”https://iot05.cumulocity.com/inventory/managedObjects/30506/childDevices”},”creationTime”:”2017-01-17T14:23:11.768+01:00″,”deviceParents”:{“references”:[],”self”:”https://iot05.cumulocity.com/inventory/managedObjects/30506/deviceParents”},”id”:”30506″,”lastUpdated”:”2017-01-17T14:23:11.768+01:00″,”name”:”HelloWorldDevice”,”owner”:”yoshihara20161226″,”self”:”https://iot05.cumulocity.com/inventory/managedObjects/30506″,”c8y_IsDevice”:{}}
(#2  data send)次に、データ送信。curlコマンドで自分の”ID””Pass””(#1)でのResponceでのid”を変えてあげて下記コマンドを送信。
curl -v -u yoshihara20161226:A****** \
-H ‘Accept: application/vnd.com.nsn.cumulocity.measurement+json; charset=UTF-8; ver=0.9’ \
-H ‘Content-type: application/vnd.com.nsn.cumulocity.measurement+json; charset=UTF-8; ver=0.9’ \
-X POST \
-d ‘{“c8y_TemperatureMeasurement”:{“T”:{“value”:30.00,”unit”:”C”}},”time”:”2017-01-22T13:00:00.123+02:00″,”source”:{“id”:”*****”},”type”:”c8y_PTCMeasurement”}’ \
https://iot05.cumulocity.com/measurement/measurements/
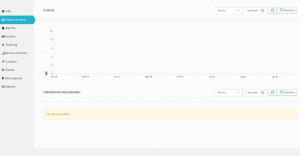
(#2  data send Results)おなじように、中ほどの”HTTP/1.1 201 Created”があれば多分コマンドはうまく行ったはず。。。。
(図7)
(図8)
(図9)
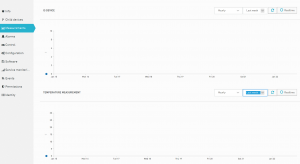
Cockpitmニューからも見れます。
数日したほうがデータ推移が見れるかも。。
まあまだ、あいまい部分多いけど。。。。とりあえず。
以上。

156_API-test_on_sakuravps

############
今回は、livedoorで天気予報のAPIを学ぶ,,,です。
Postmanの使い方を学んでいるうちに、出くわしたのがこのWebだったので、
せっかくなのでそのままブログ。。。。
############
2017/01/15
cumulocity postman API check
postmanの使い方とAPIを学ぶ、今回は

を参考に。
ーーーーーーー
まず、Postmanを使ってみる
ーーーーーーー
PostmanはGoogle Chromeのアドオン、WEBアプリ。
まずは以下からダウンロードしてインストール。
http://www.getpostman.com/
起動するとURLを入力する場所にURLを入力、
今回は習ってlivedoor 天気情報を取得、「データフォーマットはJSON形式」との事。
livedoorのAPIの仕様は下記
http://weather.livedoor.com/weather_hacks/webservice
http://weather.livedoor.com/forecast/rss/primary_area.xml
  JSONデータをリクエストする際のベースとなるURLは以下。
http://weather.livedoor.com/forecast/webservice/json/v1
このURLに下の表のパラメータを加え、実際にリクエスト。
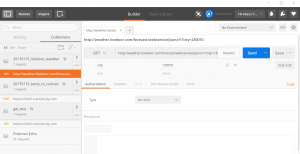
この情報を元に、早速Postmanに入れてみる。
(図1)
Capture_2017_01_15_17_32_21_920
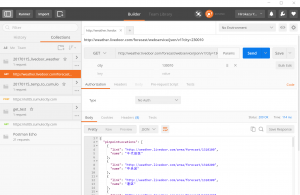
では、Sendボタンを押してみる。
(図2)
Capture_2017_01_15_17_33_16_547
200 OKでパラメータが返ってくるかと問題なし、のようです。
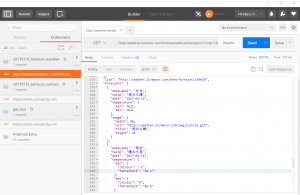
形式はJSONとの事。
(図3)
Capture_2017_01_15_17_35_55_536
あとはこの情報を元に自身のサイトに表示できるようにします。

今回は参考に習ってPHPで。
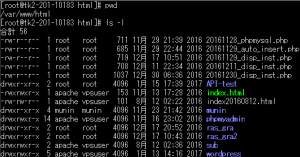
/var/www/html/
の配下に
API-test
フォルダを作成して、
20170115_tenki_simple.php
を作成します。
(図4)

Capture_2017_01_15_17_40_38_357
中身は非常に簡単(マネさせてもらった)で、
指定した地域の今日の天気とアイコンを表示するのみ。
——————
<?php
$tmp_url = “http://weather.livedoor.com/forecast/webservice/json/v1?city=130010”;
$json = file_get_contents($tmp_url,true) or die(“Failed to get json”);
$json = mb_convert_encoding($json, ‘UTF8’, ‘ASCII,JIS,UTF-8,EUC-JP,SJIS-WIN’);
$obj = json_decode($json);
$img_url = $obj->forecasts[0]->image->url;
$date = $obj->forecasts[0]->date;
$title = $obj->forecasts[0]->image->title;
$img_url1 = $obj->forecasts[1]->image->url;
$date1 = $obj->forecasts[1]->date;
$title1 = $obj->forecasts[1]->image->title;
?>
<h2>東京都の天気</h2>
<h4>(2017/01/15作成)</h4>
<div>
<p> TODAY : <?php echo $date;?></p>
<p> <?php echo “<img src='”.$img_url.”‘>”; ?> <?php echo $title; ?></p>
<p> copyright <a href=”http://weather.livedoor.com/”>livedoor 天気情報</a>'</p>
<p> TOMMOROW : <?php echo $date1;?></p>
<p> <?php echo “<img src='”.$img_url1.”‘>”; ?> <?php echo $title1; ?></p>
<p> copyright <a href=”http://weather.livedoor.com/”>livedoor 天気情報</a>'</p>
</div>
——————
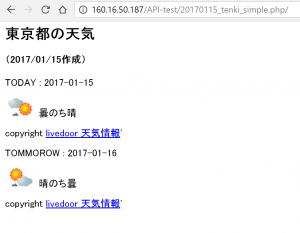
(図5)
Capture_2017_01_15_20_33_01_185
なんとか出ました!
以上!

155_RasPi_random_py_to_sql

あーーーあ、GNDと+V.V前後間違えて差し込んでしまった!!(反省。。。)

壊れたと思う、、、RaspberryPi君がチップ挿すと立ち上がらない。。。。多分短絡してるのかと。。。。あーーーーーーあ。。。

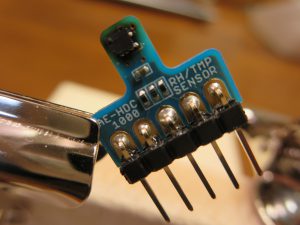
img_1160

img_1159img_1158

なので、、、、RasberryPi君からrandom数値をsakuravpsへ飛ばすのとどめます。。(悲)

ーーーーーーーーーーーーーーー

mysql-connector-pythonインストール方法
reference to
http://qiita.com/cjeecsiy/items/2fca0d674bcdedb235ad
$ git clone https://github.com/mysql/mysql-connector-python.git
$ cd mysql-connector-python
$ python ./setup.py build
$ sudo python ./setup.py install

$ python
>>> import mysql.connector as msc
>>> msc.__version__
‘2.1.3’

=================================
python 20170111_pytosql_rd1
=================================
#!/usr/bin/env python
# -*- coding: utf-8 -*-

# ドライバをimport
import mysql.connector
import random

if __name__ == ‘__main__’:
# データベースに接続

# localhost access ok!!!!!
# connect = mysql.connector.connect(user=’****’, password=’****’, host=’localhost’, database=’20161229_se***r’, charset=’utf8′)

# connect OK!!!! and select OK!!!!!
connect = mysql.connector.connect(user=’raspai’, password=’A******6′, host=’160.16.***.187′, database=’20161129_s****r’, charset=’utf8′)
cursor = connect.cursor()

# insert
# cursor.execute(‘insert into t_sensor values(20170107,100,100,”test_Raspberry”,”test_success_on_2017/01/06″‘)

# success!!
# cursor.execute(‘insert into t_sensor (time_stamp,temp,humid,water_need,memo) values (%s, %s, %s, %s, %s)’, (‘2017-01-07′,’50’,’50’,’test_from_RaspberryPi3′,’test_success_on_2017/01/06′))

temp1=random.randint(1,40)
humid1=random.randint(1,100)

cursor.execute(‘insert into t_sensor (time_stamp,temp,humid,water_need,memo) values (now(), %s, %s, %s, %s)’, (temp1,humid1,’test_random’,’from_rasp_pi_success!2017/01/11′))
# autocommitではないので、明示的にコミットする
connect.commit()

print(“insert success!”)
# データベースから切断
cursor.close()
connect.close()
=================================
crontab -e
=================================

50 * * * * sudo 20170111_pytosql_rd1
What is going on??——>OK!!!!!!

154_RasPi_温度湿度測定のセンサ焦がしたかも?(失敗?)

いよいよ、センサに接続。。。。。

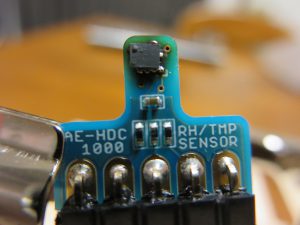
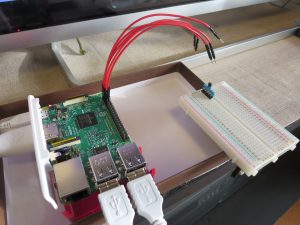
img_1154


でも焦げ臭いにおいが。。。

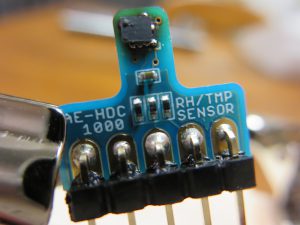
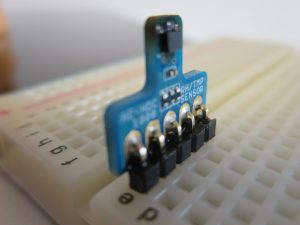
img_1155

センサ焦がしてしまったかも。。。。あーあ。。。

一応ブログ。。。

======
reference to the URL

Code Python2 is below

-rw-r–r– 1 pi pi 653 1月 9 14:30 20170109_tmp1.py
-rw-r–r– 1 pi pi 658 1月 9 15:38 20170109_tmp2.py

(測定ファイルのPythonファイルは、20170109_tmp1.pyもしくは20170109_tmp2.py)

===============
#!/usr/bin/env python
# -*- coding: utf-8 -*-
import wiringpi
import os
import struct
from time import sleep
wiringpi.wiringPiSetup() #setup wiringpi
i2c = wiringpi.I2C() #get I2C
dev = i2c.setup(0x40) #setup I2C device
i2c.write(dev,0x02) #HDC1000 CONFIGURATION POINTER
i2c.write(dev,0x10) #send 1byte
i2c.write(dev,0x00) #send 1byte
sleep((6350.0 + 6500.0 + 500.0)/1000000.0)
dataAry = struct.unpack(“BBBB”,os.read(dev,4))
os.close(dev)
temp = (dataAry[0] << 8) | (dataAry[1])
hudi = (dataAry[2] << 8) | (dataAry[3])
temp = ((temp / 65535.0) * 165 – 40)
hudi = ((hudi / 65535.0 ) * 100)
print “Humidity %.2f %%” % hudi
print “Temperature %.2f C” % temp
===============

But error occors and says
ImportError: No module named wiringpi

Then I need to install wiringgpi
reference to

WiringPi2 for Pythonをインストールする

WiringPi2のインストール

$ sudo pip install wiringpi2

message was
Successfully installed wiringpi2 wiringpi
Cleaning up…

OK!

wiringPiSetupを使うにはroot権限が必要なので、sudo pythonとしなければならない。

then

$ sudo python 20170109_tmp1.py

============

うーーーん、仕切り直し!!!

下記を参考に、
referenece to the URL
http://qiita.com/satorukun/items/0d8457df566975195f97

センサーモジュール接続

センサーモジュール設定手順
SPI有効
$ sudo raspi-config
「9 Advanced Options」 → 「A5 SPI」 → 「SPI enable」
I2C有効
$ sudo raspi-config
「9 Advanced Options」 → 「A6 SPI」 → 「I2C enable」
I2Cモジュール設定
I2Cモジュール読み込み設定
$ sudo vi /etc/modules
snd-bcm2835
i2c-dev
I2Cライブラリインストール
$ sudo apt-get install libi2c-dev
gitインストール
$ sudo apt-get install git-core
アップデート
$ sudo apt-get update
$ sudo apt-get upgrade
WiringPiインストール
$ git clone git://git.drogon.net/wiringPi
$ cd wiringPi
$ ./build
ライブラリパス設定
ライブラリパス追加設定
$ sudo vi /etc/ld.so.conf
$ sudo ldconfig

include /etc/ld.so.conf.d/*.conf
/usr/local/lib

センサーモジュールアドレス確認
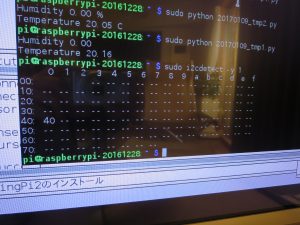
$ sudo i2cdetect -y 1

img_1157

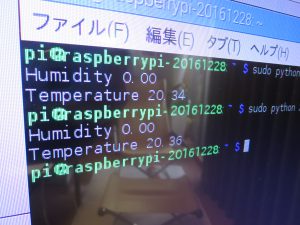
$ sudo python 20170109_tmp1.py

img_1156

OK!!!

うーーん、でも。

センサは、sudo Python。。。で動くけど

MySQLは(#では)動かない、、$なら動くけど。。

パスの設定か?インストールのミスか。。。。

もうひ一息なのになあ。。。。


以上


[153] (2017/01/08)153_RasPi_温度湿度測定の準備_はんだ付け

はんだ付けしました。下手ですが、うまく動けばよいか、と。。

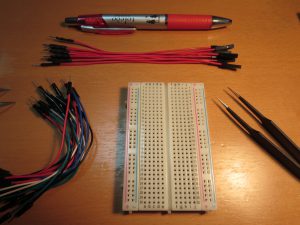
1.まず準備一覧(下図)

img_1152


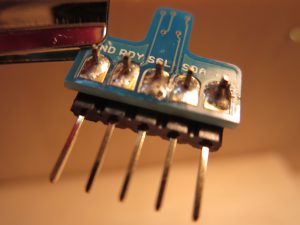
2.はんだ付けしたあと、3、4がくっついている??心配。。。(下図)

img_1149


3.なんとか、はんだの山はつながってないかな???大丈夫かも。。。。(下図)

img_1150


こんなセッティングでやりました。くまお曰く「それだけのためにこんなに準備したのー?」。

まあ、その通りだけど用意周到、準備万端でないと。。。それでも失敗リスクはつきもの。

(下図)

img_1151

さあ、いよいよ配線して、読み取りできるか?!(次回)

以上!


152_Python2 connect to MySQL(sakuravps)

Python2からMySQL(sakuravps)への接続。これも少し苦労しました。

結果、MySQLDBはダメで、connectorを使いました。

ーーーーーーーーーーーーーーーーー

rootのパスワード設定
sudo passwd root

pipのインストール
sudo pip install -U pip

pipのアップデート
sudo pip install -U pip

/etc/sudoersを編集
sudo nano /etc/sudoers

でも、MySQLdbは失敗、、、failed………….
i got below error msg.
pi@raspberrypi-20161228:~ $ python 20170104_pytosql.py
Traceback (most recent call last):
File “20170104_pytosql.py”, line 3, in <module>
import MySQLdb
ImportError: No module named MySQLdb

pi@raspberrypi-20161228:~ $ python3 20170104_pytosql.py
Traceback (most recent call last):
File “20170104_pytosql.py”, line 3, in <module>
import MySQLdb
ImportError: No module named ‘MySQLdb’
=================
気を取り直して、DLより再度トライ!(2017/01/05)

wget command
http://itpro.nikkeibp.co.jp/article/COLUMN/20060228/230995/?ST=spleaf

Webサーバーからファイルをダウンロードする
$ wget http://www.xxxxx.co.jp/file.tar.gz

$ wget https://sourceforge.net/projects/mysql-python/files/mysql-python/1.2.3/MySQL-python-1.2.3.tar.gz
DL is OK!
tar command
https://hydrocul.github.io/wiki/commands/tar.html
## 解凍して展開
$ tar xvzf tgzファイル名

$ tar xvzf MySQL-python-1.2.3.tar.gz
expand is ok!
$ pip3 install mysql-python

でも、エラー!!! 、、、but error !
Command python setup.py egg_info failed with error code 1 in /tmp/pip-build-76opifo_/mysql-python
Storing debug log for failure in /home/pi/.pip/pip.log

No module named ‘MySQLdb’ 解決で検索するが、、、、

pip install –user https://dev.mysql.com/get/Downloads/Connector-Python/mysql-connector-python-1.1.6.tar.gz
pip install –user https://dev.mysql.com/get/Downloads/Connector-Python/mysql-connector-python-1.2.3.tar.gz

PyMySQLに浮気してトライするが、、、、
pip3 install PyMySQL

失敗、、、、NG!!!!!

実行する度に対処?をやってみるが、、、、、
$ PYTHONPATH=/path/to/dir python 20170104_pytosql.py

失敗、、、、NG!!!!!

インポートする側のソースファイルで対処
インポートする側のソース(main.py)の先頭に下記を書き足す。
import sys
sys.path.append(‘/path/to/dir’)

失敗、、、、NG!!!!!
$ cd MySQL-python-1.2.3

$ python setup.py build

$ python setup.py install

$ vi 20170104_pytosql.py

import /home/pi/MySQL-python-1.2.3/MySQLdb

====================

$ pip install mysql-connector-python
is OK!!

ライブラリのインストール
$ sudo apt-get install python-pip
$ sudo pip install MySQL-python

エラーになる場合は、以下のパッケージが足りないことが多い為、追加でインストールします。

$ sudo apt-get install python-dev

$ sudo apt-get install libmysqlclient-dev

失敗、、、、NG!!!!!


+++++++++++++++++++++++++++++++++++

mysql-connector-pythonに変えてみる(これでなんとか成功!!)2017/01/07

インストール
$ pip install mysql-connector-python
host=”160.**.**.*87″
db=”2016*******nsor”
user=”r****ai”
passwd=”******”
charset=”utf8″

cursor.execute(‘insert into t_sensor (time_stamp,temp,humid,water_need,memo) values (%s, %s, %s, %s, %s)’, (‘20170107′,’50’,’50’,’test_from_RaspberryPi3′,’test_success_on_2017/01/06′))

ソースは、以下

=====================

#!/usr/bin/env python
# -*- coding: utf-8 -*-

# ドライバをimport
import mysql.connector

if __name__ == ‘__main__’:
# データベースに接続

# localhost access ok!!!!!
# connect = mysql.connector.connect(user=’***t’, password=’***t’, host=’localhost’, database=’20**12**_sen*or’, charset=’utf8′)

# connect OK!!!! and select OK!!!!!
connect = mysql.connector.connect(user=’ra**ai’, password=’A*****6′, host=’160.**.**.187′, database=’20**11**_sen*or’, charset=’utf8′)
cursor = connect.cursor()

create_date1 = now()

temp1 = ’70’

humid1= ’70’

# insert
# cursor.execute(‘insert into ******or values(20170107,100,100,”test_Raspberry”,”test_success_on_2017/01/06″‘)
cursor.execute(‘insert into ******or (time_stamp,temp,humid,water_need,memo) values (%s, %s, %s, %s, %s)’, (‘20170107′,’50’,’50’,’test_from_RaspberryPi3′,’test_success_on_2017/01/06′))
# select
cursor.execute(‘select * from t_sensor order by Num DESC limit 10’)

rows = cursor.fetchall()

# 出力
for i in rows:
print(i[0])
print(i[1])
print(i[2])
print(i[3])
print(i[4])
print(i[5])
# データベースから切断
cursor.close()
connect.close()

=====================

でも、SQLにきちんと保存されない???課題あり!!!!

あっ、でもこれは、多分

http://www.yoheim.net/blog.php?q=20151102

を参照すると、、、、、

# autocommitではないので、明示的にコミットする

connect.commit()

を追加すれば解決可能(のはず)。

またついでなんで、time_stampは、自動日時を下記で設定できるかも。。

http://www.hiihah.info/index.php?E71%EF%BC%9AMySQL%E3%81%A7%E3%81%AE%E6%97%A5%E4%BB%98%E3%80%81%E6%99%82%E5%88%BB%E3%81%AE%E3%82%A4%E3%83%B3%E3%82%B5%E3%83%BC%E3%83%88%E3%81%AB%E3%81%A4%E3%81%84%E3%81%A6

を参考にすると、

現在時刻をインサートしたい 、、結局これで入りました!!!

temp1=’80’
humid1=’80’

cursor.execute(‘insert into ****sor (time_stamp,temp,humid,water_need,memo) values (now(), %s, %s, %s, %s)’, (temp1,humid1,’test_from_RaspberryPi3′,’test_success_on_2017/01/07′))

++++++++++++++++++++++++

今のコードは以下 2017/01/08 8:00

20170106_pytosql2  <—/inset to localhost and sakuravps success!

20170106_pytosql3  <—/check python prg then select only !


#!/usr/bin/env python
# -*- coding: utf-8 -*-

# ドライバをimport
import mysql.connector

if __name__ == ‘__main__’:
# データベースに接続

# localhost access ok!!!!!
# connect = mysql.connector.connect(user=’r**t’, password=’****‘, host=’localhost’, database=’201*********’, charset=’utf8′)

# connect OK!!!! and select OK!!!!!
connect = mysql.connector.connect(user=’r***ai’, password=’A*****6′, host=’160.**.**187′, database=’**********or’, charset=’utf8′)
cursor = connect.cursor()

# insert
# cursor.execute(‘insert into ******sor values(20170107,100,100,”test_Raspberry”,”test_success_on_2017/01/06″‘)

# success!!
# cursor.execute(‘insert into ******r (time_stamp,temp,humid,water_need,memo) values (%s, %s, %s, %s, %s)’, (‘2017-01-07′,’50’,’50’,’test_from_RaspberryPi3′,’test_success_on_2017/01/06′))

temp1=’80’
humid1=’80’

cursor.execute(‘insert into *******r (time_stamp,temp,humid,water_need,memo) values (now(), %s, %s, %s, %s)’, (temp1,humid1,’test_from_RaspberryPi3′,’test_success_on_2017/01/07′))
# autocommitではないので、明示的にコミットする
connect.commit()

print(“insert success!”)
# データベースから切断
cursor.close()
connect.close()

++++++++++++++++++++++++

以上


151_Raspai@sakuravpsにnode.jsをインストール&設定

Raspasi@sakuravpsにnode.jsをインストール&設定
RaspberryPiのサーバへのデータ送信でnode.jsをつかってみようと。
まずはwin10からsakuravpsへインストールしてみようっと。
参考は、
https://liginc.co.jp/web/programming/node-js/85318
で。
1. nvmのインストール
Node.jsを使う前に、Node.jsを使った開発をおこないやすくするツールとしてNVM(Node Version Manager)を導入します。
nvmをインストールしてみましょう。
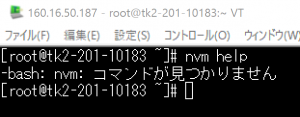
今は、nvmのコマンドが効きません。未インストール。
(図1)
capture_2017_01_03_09_59_30_177
$ git clone https://github.com/creationix/nvm.git ~/.nvm
$ source ~/.nvm/nvm.sh
(図2)
capture_2017_01_03_10_00_35_942
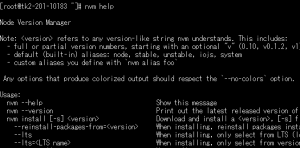
$ nvm help
で、なんか出ているのでOKかな?
(図3)
capture_2017_01_03_10_02_49_2
2. nvmコマンドでNode.jsをインストール
nvm ls-remoteでダウンロード可能なNode.jsのバージョンリストが見ることができます。
$ nvm ls-remote
最新がわからんな??
v7.3.0
なのか
v0.12.18
なのか。。。
調べは後にして、v0.12.18をインストールしてみる。。
$ nvm install 0.12.18
(図4)
capture_2017_01_03_10_08_15_402
確認をしてみましょう。
$ node -v
(図5)
capture_2017_01_03_10_09_18_804
3. nvmの設定
このままだとターミナル再起動時に同じような手順をおこなわないと使えません。いつでも使えるように設定しておきましょう。
デフォルトのNode.jsのバージョンを指定しておきます。
$ nvm alias default v0.12.18
(図6)
capture_2017_01_03_10_10_38_263
~/.bash_profileを、ターミナル起動時にnvmコマンドが適用されるように設定します。
$ vi ~/.bash_profile
以下を追記してください。
if [[ -s ~/.nvm/nvm.sh ]];
 then source ~/.nvm/nvm.sh
fi
これで次回以降ターミナルを起動したときでも、Node.jsが使えるようになりました。
Node.jsでHello World!
Node.jsはコマンドライン上で動作しますが、Webブラウザ上で動作確認をしてみます。
example20170103.jsというファイルを作成し、以下のコードを書きましょう。
var http = require(‘http’);
 
http.createServer(function (request, response) {
  response.writeHead(200, {‘Content-Type’: ‘text/plain’});
  response.end(‘Hello World! 2017/01/03 0:13\n’);
}).listen(8124);
 
console.log(‘Server running at http://160.16.50.187:8124/’);
(図7)
capture_2017_01_03_10_21_48_239
保存をしたらいよいよ実行です。
$ node example.js
(図8)
capture_2017_01_03_10_22_59_309
ターミナルが待ち受け状態になります。
この状態でブラウザからhttp://160.16.50.187:8124にアクセスしてみましょう。
(図9)
capture_2017_01_03_10_26_17_455
成功です!
(ありがとうございます。)
以上!

150_RasPiの固定IPアドレス(うちはムリ)

やはり固定IPアドレスにチャレンジしたけど。。。
うちはルータないので、MACアドレスとの対応ができなくて、、ダメ。。
一応ブログなので、記録だけ。
参考はここ。
http://blog.nambo.jp/2013/07/28/raspberrypi-set-ipaddress/
では、まずうちのモデム設定を。
(図1)
capture_2016_12_31_06_39_13_932
でメニューでDHCPを選択。
うちの場合、モデムで設定しているだけなので、
ルータがないからうまく設定できるかな?
とりあえず、
「192.168.0.50から2アドレスだけDHCP設定外にする」
、、、だけ設定できたようだ。
(図2)
capture_2016_12_31_06_38_35_3
次は、Raspberry側。
LXTerminalで以下のコマンドを入力します。
$ sudo vi /etc/network/interfaces
3行目の「dhcp」と書かれた部分を「static」に書き換え、
ルータ側で割り当てたIPアドレス、ネットマスク、ゲートウェイを
以下に従って、書き足します。
address 192.168.0.50 (設定したIPアドレス)
netmask 255.255.255.0 (ifconfigで確認したネットマスク)
gateway 192.168.0.1
ファイルをセーブしたら、ラズパイを再起動させます。再起動は、ターミナルより「sudo reboot」と入力すればできます。]
SSHでリモート操作
TeraTermを立ち上げて、ラズパイに割り当てたIPアドレスにSSHでアクセスします。
うーーーん。でも
# ifconfig
見ると、アドレスがDHCPで割り振られたまま。
そりゃそうか。。MACアドレス指定してないから、振られてしまうよな。。。
仕方ないので、このままつかいましょ。。。。。
以上!

149_MySQL_10_(最古行削除!)_on SAKURAVPS

そろそろRaspberryPi3も準備段階後半戦。。。
最古行を消すようにSQLを加える。

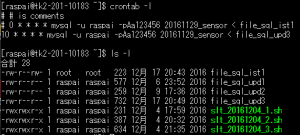
ユーザ:raspaiのcronは、
$ crontab -l

10 * * * * mysql -u raspai -pAa123456 20161129_sensor < file_sql_upd3
なので、
(図1)
capture_2016_12_30_06_05_13_805
file_sql_upd3
をいじくれば良いはず。。
最新行を選択の時は、下記のコマンドなので、
SELECT Num,temp,humid into @abc,@temp_d,@humid_d
from t_sensor WHERE Num IN (SELECT max(Num) FROM t_sensor);
最古行を選択には、、まず、、、
SELECT Num,temp,humid from t_sensor WHERE Num IN (SELECT min(Num) FROM t_sensor);
かな???
(図2)
capture_2016_12_30_06_10_13_364
Num=387が最古行のようだ。
よし、SQL良さそうだ。
(図3)
capture_2016_12_30_06_12_53_757
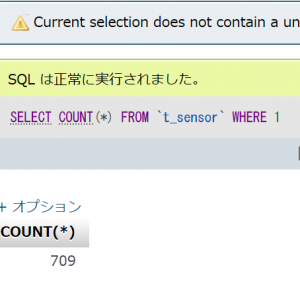
ついでに、カウントもとって前後確認しようか。
SELECT COUNT(*) FROM `t_sensor`
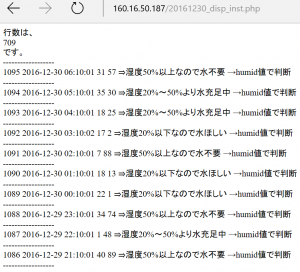
(図4)
capture_2016_12_30_06_14_46_196
709行あり!
では、加えましょう。
カウントはこっちにいれようか、と。
(図5)
capture_2016_12_30_06_20_33_962
確か場所は、、、
/var/www/html

ファイルは、
20161129_disp_inst.php
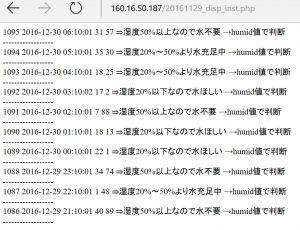
ここに、
//SQLクエリを実行します。(カウント追加2016/12/30)
$res1 = mysql_query(‘SELECT count(*) from t_sensor’) or die(mysql_error());
を追加して表示させます。
while ($row1 = mysql_fetch_array($res1, MYSQL_NUM)){
echo $row1[0].”\t”;
echo “<br />\n”;
echo “——————\n<br>”;
}
20161230_disp_inst.php
で実行、いい感じね。!!
(図6)
capture_2016_12_30_06_36_55_363
一行削る方は、、、と。
file_sql_upd4
を作りましょう!
最古行を削除するには、、、
delete FROM `t_sensor` WHERE Num IN (SELECT min(Num) FROM t_sensor);
では、うまく行かなかったので、
DELETE FROM t_sensor ORDER BY Num ASC LIMIT 1;
うーーん、Numの最初の行を削るにしたけど、、、、まいいか。。。
これを加えます。
crontabを変更
10 * * * * mysql -u raspai -pAa123456 20161129_sensor < file_sql_upd4
に修正
これでOKかな?
705行を維持すれば、良いはず。。
Webも修正しておこっと。。
以上!!

148_RasPiのsshとvnc接続(Ubuntu Remmina利用)

Raspberry Pi3のsshとvnc接続
下記を参考に!
http://desktop-linux.namakemono345.com/ssh-vnc/
1.sshの接続確認
RaspberryPi3のアドレスは、
192.168.0.12
なので、HyperVのUbuntuからSSH接続してみます。
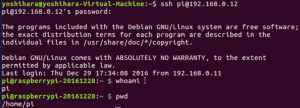
(多分大丈夫なはずだけど。)
# ssh ユーザー名@192.168.0.10
でOK!
(接続できました!)
(図1)
capture_2016_12_29_17_45_24_102
2.VNCのインストールと初期設定
Raspberry Pi3に接続したら、以下コマンドでVNCサーバをインストールします。。。
だけどこれ昨日やったんだよな。確か。
(図2)
capture_2016_12_29_17_47_35_747
やはり!OK!
インストールが完了したら以下コマンドでvncserverを起動します。
# vncserver :1
(図3)
capture_2016_12_29_17_49_34_404
4.VNC接続
今回はUbuntu(PC)からVNCでRaspberryPi3に接続するわけですが、UbuntuにはデフォルトでRemminaというVNCクライアントとしても使えるソフトウェアがインストールされていますので、それを使います。
(これがやりたかった!さあ!)
[アクティビティ]からアプリケーションの一覧を表示し、[Remmina]を選択して起動しましょう。
(あるかな???おお、あったよ!!)
(図4)
capture_2016_12_29_17_55_38_361
Remminaを起動したら、「新規」ボタンをクリックします。
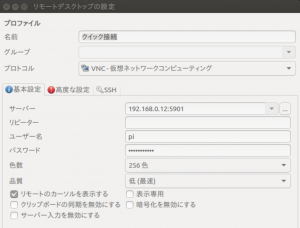
接続設定ウィンドウが開いたら、プロトコルを「VNC – 仮想ネットワークコンピューティング」に変更し、「サーバー」には「ipアドレス:5901」を入力の後、Raspberry Pi3のログインユーザーとパスワードを入力して「Connect」ボタンをクリックします。
OK!!
(図5)
capture_2016_12_29_17_58_55_201
capture_2016_12_29_18_00_48_752
5.vncserverの自動起動
一通りリモート接続が可能になりましたが、VNCを使うことを考えるとこのままではRaspberry Pi3を起動するたびに毎回[vncserver :1]を実行する必要があります。
それはそれで面倒なので、cronで自動起動するようにしたいと思います。
(。。。確かに!)
Raspberryで以下コマンドを実行します
# sudo crontab -e
コマンドを実行するとエディタを選択するように促されるので、1-3から好きなエディタを選択してください
(今回は、3で)
エディタを選択したら末尾に以下1行を追加して上書き保存します
# @reboot su -c “vncserver :1” user
RaspberryPi3を再起動して、再度VNCで接続!!!!
(できました!)
(図6)
capture_2016_12_29_18_25_40_542
固定アドレスはやめておこう!っと。
以上!