あーあ、RaspberryPi君壊しちゃった。。。
Docomoの充電器つなげたら使えるか?実験したら、
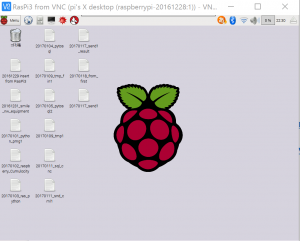
左奥のランプ2このうち1つが点灯しない。。。
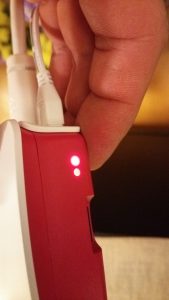
LAN内でのMACアドレスも反応しない。。。
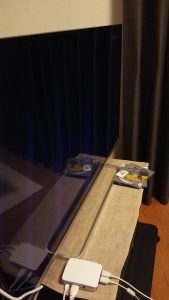
TV画面にもラズベリーが映らない。。。あーあ。。。
DSC_0077
悲しい。。。。
(様子みて買いなおそうか。。。。)
以上

あーあ、RaspberryPi君壊しちゃった。。。
Docomoの充電器つなげたら使えるか?実験したら、
左奥のランプ2このうち1つが点灯しない。。。
LAN内でのMACアドレスも反応しない。。。
TV画面にもラズベリーが映らない。。。あーあ。。。
DSC_0077
悲しい。。。。
(様子みて買いなおそうか。。。。)
以上
いや、、苦労したけどなんとか。。。。。
でも、、、
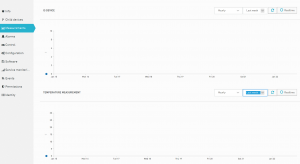
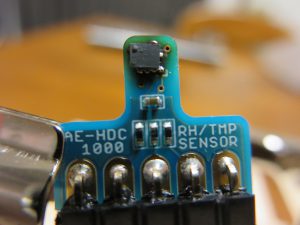
・humidデータは0.0のままなのでこれは故障かも?(デバイスの写真)
・RaspberryPi側も+3.3Vを接続するときたまにRinuxが立ち上がらない?(回路の写真)

ので自分の半田不良か?そもそも安い製品のリスク?か。。。
まあ、たまたまできたときなので、一応メモを残しておきましょう。
<coding>
#!/usr/bin/env python

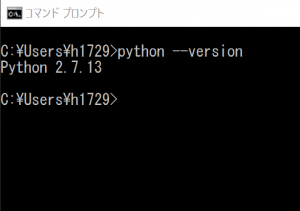


長いな目だけど、要は自宅PC(win10)上のHyperVで動いているLinux(CentOS6.8)から、前例とおなじようにCumulocityへデータを継続的に送れるか?やってみます。
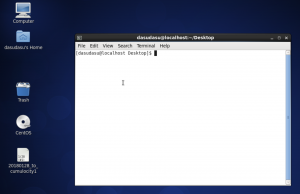
(図1)まずCentOSへ入ります。

コマンドカーソルを表示して。。。
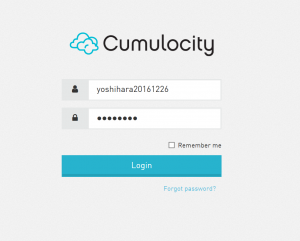
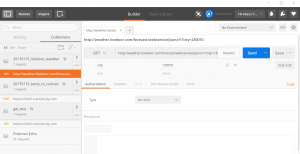
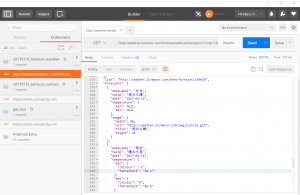
(図2)コマンドは同じ。まずDeviceのCreateから。
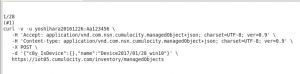
(#1)
curl -v -u yoshihara20161226:Aa123456 \
-H ‘Accept: application/vnd.com.nsn.cumulocity.managedObject+json; charset=UTF-8; ver=0.9’ \
-H ‘Content-type: application/vnd.com.nsn.cumulocity.managedObject+json; charset=UTF-8; ver=0.9’ \
-X POST \
-d ‘{“c8y_IsDevice”:{},”name”:”Device2017/01/28_win10″}‘ \
https://iot05.cumulocity.com/inventory/managedObjects
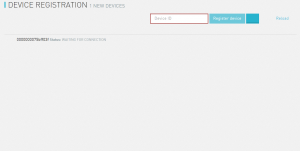
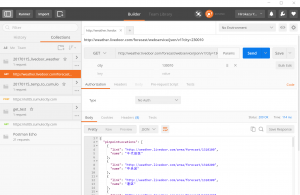
(図3)返信あり。ConnectedとかCreatedが見えればOK、、、ぽい。

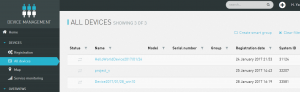
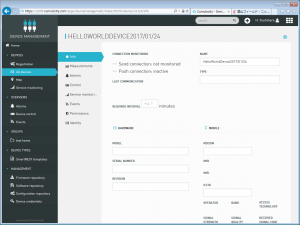
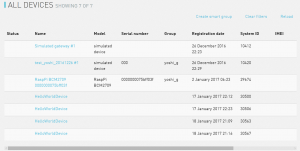
(図4)Cumulocityにはいってみると、「Device2017/01/28_win10」が見えます。当たり前だけど。。
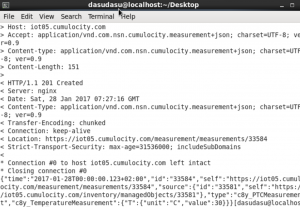
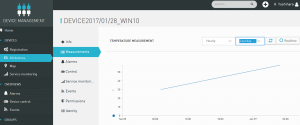
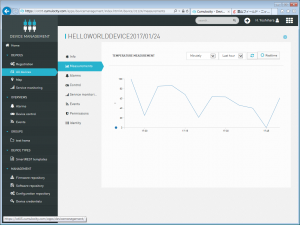
(図5)さあ、単品でデータを送信してみる、、と。今度のIDは「33581」。ここだけ修正して、、、と。
(#2)
curl -v -u yoshihara20161226:Aa123456 \
-H ‘Accept: application/vnd.com.nsn.cumulocity.measurement+json; charset=UTF-8; ver=0.9’ \
-H ‘Content-type: application/vnd.com.nsn.cumulocity.measurement+json; charset=UTF-8; ver=0.9’ \
-X POST \
-d ‘{“c8y_TemperatureMeasurement”:{“T”:{“value”:30,”unit”:”C”}},”time”:”2017-01-28T00:00:00.123+02:00″,”source”:{“id”:”33581“},”type”:”c8y_PTCMeasurement”}’ \
https://iot05.cumulocity.com/measurement/measurements/
さて、反応は。。。。。OKかな???
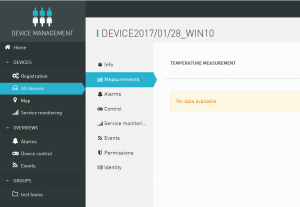
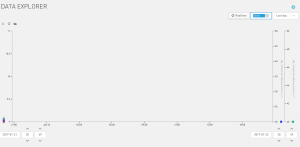
画面では、Measurementタブができているので、明日あたりデータ見えるかな??
では、Python+crontabで連続定期的ダミーデータ送信、、、にトライ。
同様に、これでいくね!!
crontabも設定しました。
*/1 * * * * python 20170128_to_cum_win10_1
さあ、様子みましょう!!
![]()
以上


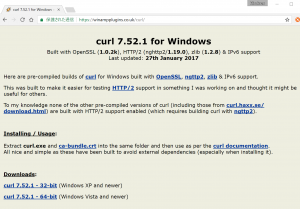
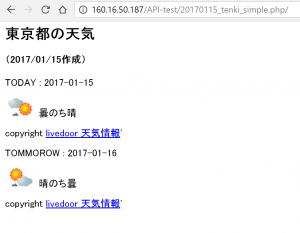
今回は参考に習ってPHPで。
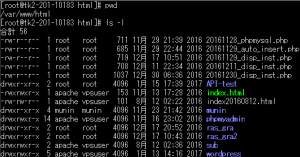
/var/www/html/
の配下に
API-test
フォルダを作成して、
20170115_tenki_simple.php
を作成します。
(図4)
あーーーあ、GNDと+V.V前後間違えて差し込んでしまった!!(反省。。。)
壊れたと思う、、、RaspberryPi君がチップ挿すと立ち上がらない。。。。多分短絡してるのかと。。。。あーーーーーーあ。。。
なので、、、、RasberryPi君からrandom数値をsakuravpsへ飛ばすのとどめます。。(悲)
ーーーーーーーーーーーーーーー
mysql-connector-pythonインストール方法
reference to
http://qiita.com/cjeecsiy/items/2fca0d674bcdedb235ad
$ git clone https://github.com/mysql/mysql-connector-python.git
$ cd mysql-connector-python
$ python ./setup.py build
$ sudo python ./setup.py install
$ python
>>> import mysql.connector as msc
>>> msc.__version__
‘2.1.3’
=================================
python 20170111_pytosql_rd1
=================================
#!/usr/bin/env python
# -*- coding: utf-8 -*-
# ドライバをimport
import mysql.connector
import random
if __name__ == ‘__main__’:
# データベースに接続
# localhost access ok!!!!!
# connect = mysql.connector.connect(user=’****’, password=’****’, host=’localhost’, database=’20161229_se***r’, charset=’utf8′)
# connect OK!!!! and select OK!!!!!
connect = mysql.connector.connect(user=’raspai’, password=’A******6′, host=’160.16.***.187′, database=’20161129_s****r’, charset=’utf8′)
cursor = connect.cursor()
# insert
# cursor.execute(‘insert into t_sensor values(20170107,100,100,”test_Raspberry”,”test_success_on_2017/01/06″‘)
# success!!
# cursor.execute(‘insert into t_sensor (time_stamp,temp,humid,water_need,memo) values (%s, %s, %s, %s, %s)’, (‘2017-01-07′,’50’,’50’,’test_from_RaspberryPi3′,’test_success_on_2017/01/06′))
temp1=random.randint(1,40)
humid1=random.randint(1,100)
cursor.execute(‘insert into t_sensor (time_stamp,temp,humid,water_need,memo) values (now(), %s, %s, %s, %s)’, (temp1,humid1,’test_random’,’from_rasp_pi_success!2017/01/11′))
# autocommitではないので、明示的にコミットする
connect.commit()
print(“insert success!”)
# データベースから切断
cursor.close()
connect.close()
=================================
crontab -e
=================================
50 * * * * sudo 20170111_pytosql_rd1
What is going on??——>OK!!!!!!
いよいよ、センサに接続。。。。。
でも焦げ臭いにおいが。。。
センサ焦がしてしまったかも。。。。あーあ。。。
一応ブログ。。。
======
reference to the URL
Code Python2 is below
-rw-r–r– 1 pi pi 653 1月 9 14:30 20170109_tmp1.py
-rw-r–r– 1 pi pi 658 1月 9 15:38 20170109_tmp2.py
(測定ファイルのPythonファイルは、20170109_tmp1.pyもしくは20170109_tmp2.py)
===============
#!/usr/bin/env python
# -*- coding: utf-8 -*-
import wiringpi
import os
import struct
from time import sleep
wiringpi.wiringPiSetup() #setup wiringpi
i2c = wiringpi.I2C() #get I2C
dev = i2c.setup(0x40) #setup I2C device
i2c.write(dev,0x02) #HDC1000 CONFIGURATION POINTER
i2c.write(dev,0x10) #send 1byte
i2c.write(dev,0x00) #send 1byte
sleep((6350.0 + 6500.0 + 500.0)/1000000.0)
dataAry = struct.unpack(“BBBB”,os.read(dev,4))
os.close(dev)
temp = (dataAry[0] << 8) | (dataAry[1])
hudi = (dataAry[2] << 8) | (dataAry[3])
temp = ((temp / 65535.0) * 165 – 40)
hudi = ((hudi / 65535.0 ) * 100)
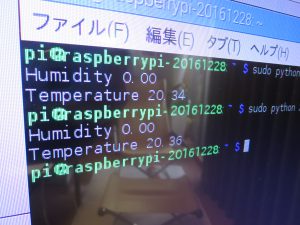
print “Humidity %.2f %%” % hudi
print “Temperature %.2f C” % temp
===============
But error occors and says
ImportError: No module named wiringpi
Then I need to install wiringgpi
reference to
WiringPi2のインストール
$ sudo pip install wiringpi2
message was
Successfully installed wiringpi2 wiringpi
Cleaning up…
OK!
wiringPiSetupを使うにはroot権限が必要なので、sudo pythonとしなければならない。
then
$ sudo python 20170109_tmp1.py
============
うーーーん、仕切り直し!!!
下記を参考に、
referenece to the URL
http://qiita.com/satorukun/items/0d8457df566975195f97
センサーモジュール接続
センサーモジュール設定手順
SPI有効
$ sudo raspi-config
「9 Advanced Options」 → 「A5 SPI」 → 「SPI enable」
I2C有効
$ sudo raspi-config
「9 Advanced Options」 → 「A6 SPI」 → 「I2C enable」
I2Cモジュール設定
I2Cモジュール読み込み設定
$ sudo vi /etc/modules
snd-bcm2835
i2c-dev
I2Cライブラリインストール
$ sudo apt-get install libi2c-dev
gitインストール
$ sudo apt-get install git-core
アップデート
$ sudo apt-get update
$ sudo apt-get upgrade
WiringPiインストール
$ git clone git://git.drogon.net/wiringPi
$ cd wiringPi
$ ./build
ライブラリパス設定
ライブラリパス追加設定
$ sudo vi /etc/ld.so.conf
$ sudo ldconfig
include /etc/ld.so.conf.d/*.conf
/usr/local/lib
センサーモジュールアドレス確認
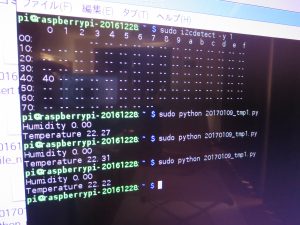
$ sudo i2cdetect -y 1
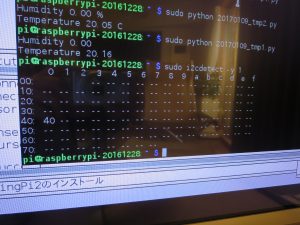
$ sudo python 20170109_tmp1.py
OK!!!
うーーん、でも。
センサは、sudo Python。。。で動くけど
MySQLは(#では)動かない、、$なら動くけど。。
パスの設定か?インストールのミスか。。。。
もうひ一息なのになあ。。。。
以上
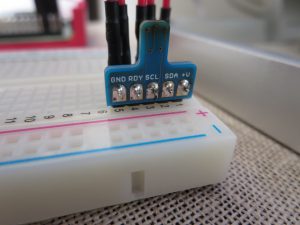
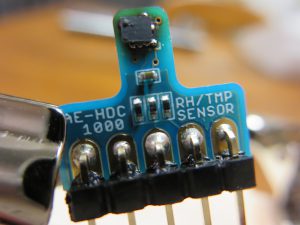
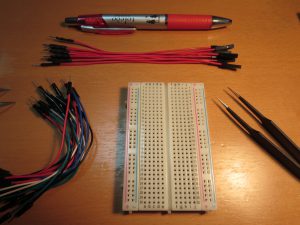
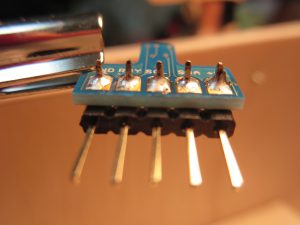
はんだ付けしました。下手ですが、うまく動けばよいか、と。。
1.まず準備一覧(下図)
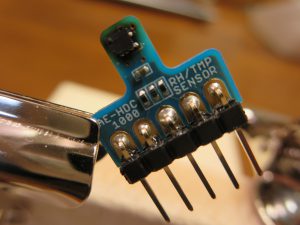
2.はんだ付けしたあと、3、4がくっついている??心配。。。(下図)
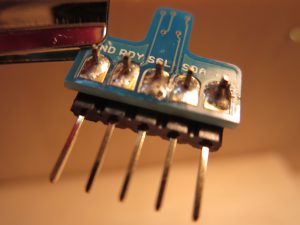
3.なんとか、はんだの山はつながってないかな???大丈夫かも。。。。(下図)
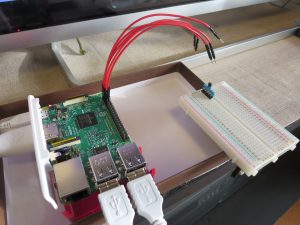
こんなセッティングでやりました。くまお曰く「それだけのためにこんなに準備したのー?」。
まあ、その通りだけど用意周到、準備万端でないと。。。それでも失敗リスクはつきもの。
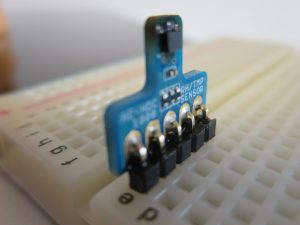
(下図)
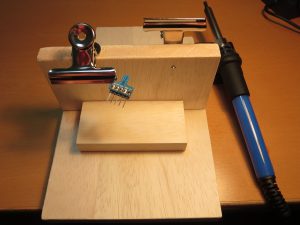
さあ、いよいよ配線して、読み取りできるか?!(次回)
以上!