167_TensorFlow_from_google_AI_2

TensorFlowに挑戦2

続けて。。TensprFlowのインストール。。
CPU実行バイナリ、、とやらをダウンロードします。
コマンドは
$ docker run -it -p 8888:8888 -p 6006:6006 –name tf gcr.io/tensorflow/tensorflow /bin/bash
おお、何かやっとる。。。。
(図1)

同じコンテナを再起動する場合は、これだと。
> docker start -i tf
(図2)
次にTensorFlowの動作確認
今、コンテナが立ち上がっている状態だと。
root@920195b1f780:/notebooks#
のコマンド待ちだからそうかな??
Pythonを起動
実験。。。
root@920195b1f780:/notebooks# python
Python 2.7.6 (default, Oct 26 2016, 20:30:19)
[GCC 4.8.4] on linux2
Type “help”, “copyright”, “credits” or “license” for more information.
>>> import tensorflow as tf
>>> hello = tf.constant(‘Hello World 2017/02/08 ‘)
>>> sess = tf.Session()
>>> print(sess.run(hello))
Hello World 2017/02/08
(図3)
計算も!
>>> a = tf.constant(1000)
>>> b = tf.constant(1001000)
>>> print(sess.run(a+b))
1002000
(図4)
一応、OKみたいね!
TensorFlowのインストール。
Pythonのバージョンに応じて、、、だって?
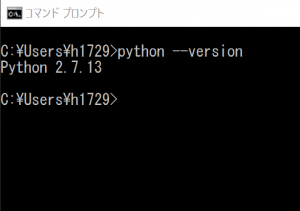
2.7.13か。。。
(図5)
 Ubuntuの場合、コマンドは、
$ docker run -it ubuntu bash
 でUbuntu上げておいて、、、、
$ export TF_BINARY_URL=https://storage.googleapis.com/tensorflow/linux/cpu/tensorflow-0.11.0rc2-cp27-none-linux_x86_64.whl
$ sudo pip install –upgrade $TF_BINARY_URL
Python環境のインストールはこれ。
$ sudo apt-get install python-pip python-dev
pipをインストールしてみるか。。。
https://websetnet.com/ja/install-pytonpip-ubuntu-1510-ubuntu-1504-ubuntu-1404/
を参考に下記のコマンドを
$ sudo apt-get update
$ sudo apt-get upgrade
$ apt-get -y install python-pip
$ apt-get -y install python-dev
も。。。。 では、再度、
$ export TF_BINARY_URL=https://storage.googleapis.com/tensorflow/linux/cpu/tensorflow-0.11.0rc2-cp27-none-linux_x86_64.whl
$ sudo pip install –upgrade $TF_BINARY_URL
何かインストールしとる。。。
明日、TendorFlowに必要なライブラリのインストールを!!!
以上
166_TensorFlow_from_google_AI

TensorFlowに挑戦
月刊InterFaceの3月号「TensorFlow」を参照してます。っていうかそのまま。。素人だから、まいいか。ね。
■まずDockerToolBoxのインストール
https://www.docker.com/
(図1)
Windowsを選択
(図2)
インストール開始
(図3)
インストール中
(図4)
インストール終了
(図5)
Dockerの動作確認
DockerQuickstart Terminalを起動、、ってういか
勝手に上がったぞ。。最初だからかな?。

あれ、でもTerminalがメニューにないな。。
https://docs.docker.com/docker-for-windows/

の英語マニュアルだと、、、
MS-DOSのコマンドプロンプトで良いみたい。。
コマンド実行
(図7)

更に、下記コマンドも。。。
$ docker run hello-world
何か出たけどOKかな?
(図8)

2回めは素直に出たな。。
(図9)
Ubuntuのコンテナをインストール
$ docker run -it ubuntu bash
(図10)
nginxとやらをインストール
$ docker run -d -p 80:80 –name webserver nginx
(図11)
Webでhttp://localhostを入力
(図12)
Webを立ち上げると、$ docker psコマンドでステータスが見える、と。
(図13)
If you want to stop the webserver, type: 「docker stop webserver」
and start it again with 「docker start webserver」
だって。。
あれ??やっぱりDockerToolBoxが無い。。やりなおし?
(図14)
(図15)
(図16)
はい、やり直そうと思ったけど、エラーメッセージ。。
(図1)
どうやら、すでにHyper-Vがあるとダメっと。。ならば最初のまま。
Dockerが入ってればよいなら、TensorFlowはインストールできるかも。と。。。
戻し。。。
以上

165_RaspberryPi3_to_sakuravps_data_sending

あーあ、なんとか元通り。そのまま書きます。。。。

==========================

20170205_pytosql6.py

==========================

#!/usr/bin/env python
# -*- coding: utf-8 -*-
# import module
import os
import random # モジュールのインポート
# ドライバをimport
import mysql.connector
if __name__ == ‘__main__’:
# データベースに接続
# localhost access ok!!!!!
connect = mysql.connector.connect(user=’***t’, password=’***t’, host=’********t’, database=’201****_s***or’, charset=’utf8′)
cursor = connect.cursor()
# sakuravps access
# connect1 = mysql.connector.connect(user=’r****i’, password=’A******6′, host=’1*0.16.**.1*7′, database=’2****129_s***or’, charset=’utf8′)
# cursor = connect1.cursor()
temp=random.randint(0, 50)
humid=random.randint(0, 100)
# insert
# cursor.execute(‘insert into t_sensor (time_stamp,temp,humid,water_need,memo) values (now(), %s, %s, %s, %s)’, (100,100,’20170205test’,’test_success_2017/02/05′))
cursor.execute(‘insert into t_sensor (time_stamp,temp,humid,water_need,memo) values (now(), %s, %s, %s, %s)’, (temp,humid,’2017/02/06_test’,’test_success_2017/02/06′))
# Delete
cursor.execute(‘DELETE FROM t_sensor ORDER BY Num ASC LIMIT 1’)
# select
cursor.execute(‘select * from t_sensor order by Num DESC limit 2’)
rows = cursor.fetchall()
# 出力
for i in rows:
print(“————————“)
print(i[0])
print(i[1])
print(i[2])
print(i[3])
print(i[4])
print(i[5])
# autocommitではないので、明示的にコミットする
connect.commit()
# データベースから切断
cursor.close()
connect.close()
==========================
20170206_sndsak2.py
==========================
#!/usr/bin/env python
# -*- coding: utf-8 -*-
# import module
import os
import random # モジュールのインポート
# ドライバをimport
import mysql.connector
if __name__ == ‘__main__’:
# データベースに接続
# localhost access ok!!!!!
connect = mysql.connector.connect(user=’***t’, password=’***t’, host=’********t’, database=’20******5_s****r’, charset=’utf8′)
cursor = connect.cursor()
# select
cursor.execute(‘select * from t_sensor order by Num DESC limit 1’)
rows = cursor.fetchall()
# 出力
for i in rows:
print(“—send below data to sakravps success !!—-“)
print(i[0])
print(i[1])
print(i[2])
print(i[3])
print(i[4])
print(i[5])
# sakuravps access
connect = mysql.connector.connect(user=’r***ai’, password=’A****456′, host=’1*0.**.**.1*7′, database=’20*****9_****or’, charset=’utf8′)
cursor = connect.cursor()
# insert
cursor.execute(‘insert into t_sensor (time_stamp,temp,humid,water_need,memo) values (%s, %s, %s, %s, %s)’, (i[1],i[2],i[3],i[4],i[5]))
# Delete
cursor.execute(‘DELETE FROM t_sensor ORDER BY Num ASC LIMIT 1’)
# autocommitではないので、明示的にコミットする
connect.commit()
# データベースから切断
cursor.close()
connect.close()
==========================
ちなみにcrontabは下記です。
50 * * * * sudo python 20170205_pytosql6.py
51 * * * * sudo python 20170206_sndsak2.py
==========================
The End

164_RaspberryPi3_mysql-connector-python

MySQLとPythonとの接続について特に詳述。。。

MySQLのインストールは簡単だったけど、connectorがてこずったので。。。

下記参照、

http://qiita.com/R-STYLE/items/cb71b8b90c2af1ad059e

なぜか私も

$ sudo pip install mysql-connector-python-rf

で成功。-rfってなんだか知らないけど。successと出たので。

■次にphpmysqladminもインストールしよう。何かとべんりなので。

参考は、ここ。

LinuxにphpMyAdminをインストールする方法

以下コマンドで解凍。

$ cd ~/Download
$ tar -zxf phpMyAdmin-4.2.2-all-languages.tar.gz
$ mv phpMyAdmin-4.2.2-all-languages.tar.gz phpMyAdmin

■Apacheのインストール

Aoacheをいれないと、、これを入れてドキュメントルートにphpMyAdminのフォルダを置く必要があるらしいので、、ここを参照。

ApacheとPHPのインストールはここを参照。古いけど。(http://www.feijoa.jp/laboratory/programming/phpEnvironment/)

Apacheのインストール

 では、WEBサーバ―の定番 Apache のインストールに入ります。現在の Raspbian はwheezyがベースになっていて、これでapt-getできるのは Apache 2.2.22になります。

sudo apt-get install apache2
/usr/sbin/apache2 -v

 Apacheが実行されるユーザ名を確認しておきましょう。

#内容確認
cat /etc/apache2/envvars

export APACHE_RUN_USER=www-data
export APACHE_RUN_GROUP=www-data

 このように、Debian系では www-data がApacheのグループ・ユーザー名になってるようです。

 今後の事を考え、pi ユーザーをapache2のグループに追加しておきましょう。

#現在の pi ユーザーの所属グループの確認
id pi

#www-dataグループに追加
sudo gpasswd -a pi www-data

#追加できたか確認
id pi
補足)ユーザーをグループから削除
sudo gpasswd -d pi www-data


PHPのインストール

PHPはこっち参照(大変、わかりやすい。。。ありがたい)。http://kamuycikap.hatenablog.com/entry/2015/02/25/184420

PHP5のインストール

$ sudo apt-get install php5

これも待つだけ。

PHP5の動作確認

index.htmlをphpファイルとしてコピー

$ cd /var/www/
$ sudo cp ./index.html ./index_php.php

ブラウザで指定して「I work!」が表示されれば動作している

http://XXX.XXX.XXX.XXX/index_php.php


PHP5-mysqlのインストール

コマンド叩くだけ

$ sudo apt-get install php5-mysql


phpMyAdminのインストール

このコマンド叩きます。
途中でユーザーとかパスワードとか聞かれます。
そのあたりはお好みで。

$ sudo apt-get install phpmyadmin
選択方法 → スペースバー叩いたら「*」がマークされます
自動再設定をする web サーバ:
 [] apache2
 [] lighttpd


phpMyAdminの確認

まず、設定ファイルを書き換えます

$ vi /etc/apache2/apache2.conf

内容は下記の通り、一番下に追加します。

Include /etc/phpmyadmin/apache.conf

そして、apache2を再起動します。

$ sudo /etc/init.d/apache2 restart

再起動後、ブラウザで下記のURLにアクセス!!

http://XXX.XXX.XXX.XXX/phpmyadmin/

ログイン画面が表示されたらOKです。

なんとかOK!!、ありがとうございます。

以上


163_RaspberryPi3_SDCard_format

ラズパイ壊れた事件から調査を進めると、SDカードが空になっていました。。。電源を電池からとってみようとした際基盤に触れたか?でACTが点灯せず。。。WindowsでSDカードの中を調べたら、ファイル群が空に。。(悲)

気を取り直して、16GBのSDカードを購入したので、きちんとLinuxインストールからやってみましょう。

■まずSDカードのゴーマット。参考はここ。

https://www.sdcard.org/jp/downloads/formatter_4/

SDCArdFormatterというプログラムをインストール

■OSインストール

NOOBSからインストールしてみます。URLは下記。

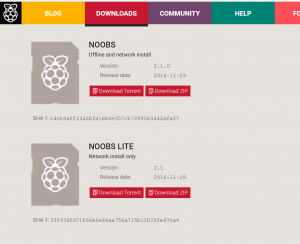
Downloads

NOOBSをダウンロードして、解凍。。。

解凍したら、ZIPファイルのすべてをSDカードにコピー。。

SDカードをラズパイに差し込み、起動したら、一番上のメニューを選択。

言語は日本語を選び、インストール。。。。か。。。

DSC_0079

■日本語入力ソフト のインストール

$ sudo apt update

$ sudo apt install ibus-mozc

$ sudo apt install fonts-ipafont fonts-ipaexfont

$ sudo reboot

■デスクトップ向けに日本語を設定

・ロケール、タイムゾーン、キー配列の設定。。。。。

OKかな。

以上

162_RaspberryPi_broken?

あーあ、RaspberryPi君壊しちゃった。。。

Docomoの充電器つなげたら使えるか?実験したら、

左奥のランプ2このうち1つが点灯しない。。。

LAN内でのMACアドレスも反応しない。。。

TV画面にもラズベリーが映らない。。。あーあ。。。

DSC_0077

悲しい。。。。

(様子みて買いなおそうか。。。。)

以上


161_RaspberryPi_Temp&humid_data_sending_to_SAKURAVPS

いや、、苦労したけどなんとか。。。。。

でも、、、

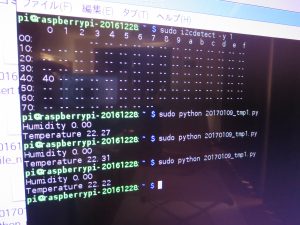
・humidデータは0.0のままなのでこれは故障かも?(デバイスの写真)

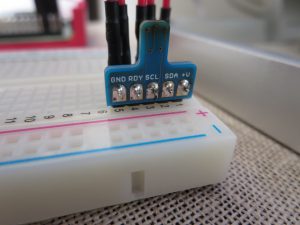
・RaspberryPi側も+3.3Vを接続するときたまにRinuxが立ち上がらない?(回路の写真)

ので自分の半田不良か?そもそも安い製品のリスク?か。。。

まあ、たまたまできたときなので、一応メモを残しておきましょう。


<coding>

#!/usr/bin/env python

# -*- coding: utf-8 -*-
# ドライバをimport
import mysql.connector
import datetime
import wiringpi
import os
import struct
from time import sleep
wiringpi.wiringPiSetup() #setup wiringpi
i2c = wiringpi.I2C() #get I2C
dev = i2c.setup(0x40) #setup I2C device
i2c.write(dev,0x02) #HDC1000 CONFIGURATION POINTER
i2c.write(dev,0x10) #send 1byte
i2c.write(dev,0x00) #send 1byte
sleep((6350.0 + 6500.0 +  500.0)/1000000.0)
dataAry = struct.unpack(“BBBB”,os.read(dev,4))
os.close(dev)
temp3 = (dataAry[0] << 8) | (dataAry[1])
hudi3 = (dataAry[2] << 8) | (dataAry[3])
temp3 = ((temp3 / 65535.0) * 165 – 40)
hudi3 = ((hudi3 / 65535.0 ) * 100)
print “Humidity %.2f %%” % hudi3
print “Temperature %.2f C” % temp3
# ドライバをimport
# import mysql.connector
if __name__ == ‘__main__’:
       # データベースに接続
        connect = mysql.connector.connect(user=’*****i’, password=’******6′, host=’****.****.****.****’, database=’2016*********or’, charset=’utf8′)
        cursor = connect.cursor()
        today = datetime.datetime.today()
        temp_fin=int(temp3)
        hudi_fin=int(hudi3)
        print “————“
        print today.strftime(“%Y-%m-%d %H:%M:%S”)
        print “Final_Humidity %.2f %%” % hudi_fin
        print “Final_Temperature %.2f C” % temp_fin
        print “————“
        ###############
        cmd = ‘insert into t_sensor (time_stamp,temp,humid,water_need,memo) values (“{}”,”{}”,”{}”,”{}”,”{}”)’.format(today.strftime(“%Y-%m-%d %H:%M:%S”),temp_fin, hudi_fin,”Real_Data”,”Real_Data”)
        print cmd
        print “————“
        cursor.execute(cmd)
        cursor.execute(‘DELETE FROM t_sensor ORDER BY Num ASC LIMIT 1’)
        # autocommitではないので、明示的にコミットする
        connect.commit()
        print “success!_20170129”
        # データベースから切断
        cursor.close()
        connect.close()

160_Data_Sending_to_Cumulocity (IoT)_from_PC_win10_itself___but_NG!

Python2をwindows10にインストールしてみます。
参考は、ここ。
http://www.python-izm.com/contents/introduction/install.shtml
(図1)

まず、ダウンロード。ここから
https://www.python.org/downloads/
(図2)

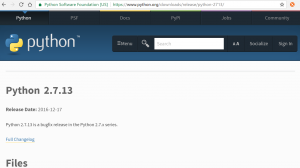
私は、「Python 2.7.13」にします。
(図3)

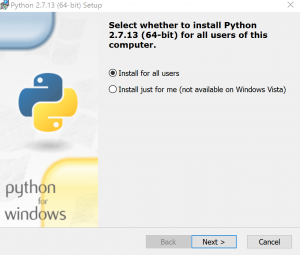
AllUserでインストール開始
(図4)
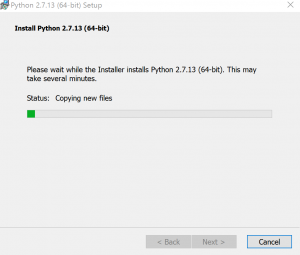
簡単、インストール中
(図5)

インストール完了
(図6)
環境変数を設定します。

環境変数ダイアログが表示されます。
システム環境変数の Path を選択して、[編集] ボタンをクリックします。
変数値の末尾に “;C:\Python27” (Python 2.7 をインストールしたフォルダ) を追記します。
今度は、システム環境変数の [新規] ボタンをクリックします。
変数名に PYTHONPATH を、変数名に “C:\Python27\Lib\site-packages” を指定します。
(Python 2.7 をインストールしたフォルダにある Lib\site-packages フォルダ)
[OK] ボタンをクリックして、環境変数ダイアログに戻ります。
これで一応OKかな?
(図7)
では、ここからCumulocityに登録できるか?をやってみます。
コマンドは、下記
(#1)
curl -v -u yoshihara20161226:Aa123456
-H ‘Accept: application/vnd.com.nsn.cumulocity.managedObject+json; charset=UTF-8; ver=0.9’
-H ‘Content-type: application/vnd.com.nsn.cumulocity.managedObject+json; charset=UTF-8; ver=0.9’
-X POST
-d ‘{“c8y_IsDevice”:{},”name”:”Device2017/01/28_win10″}’
https://iot05.cumulocity.com/inventory/managedObjects
はい、NG!!!
curlコマンドが使えません、と。そりゃそうだ!
ではインストールしましょう。
ここ参考。
https://www.ipentec.com/document/document.aspx?page=software-install-curl-for-windows
(図8)
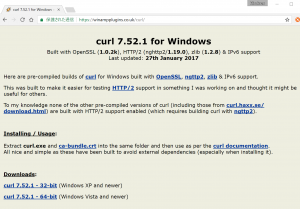
今回は、Win64 x86_64 7zipを選びます。
(図9)
同じように、環境設定で、PATH設定もしちゃう!
C:\Users\h1729\Desktop\curl_7_52_1_openssl_nghttp2_x64
OKかな?
(図10)
再度、Createコマンドを投げてみる!
curl -v -u yoshihara20161226:Aa123456 -H ‘Accept: application/vnd.com.nsn.cumulocity.managedObject+json; charset=UTF-8;ver=0.9’-H ‘Content-type: application/vnd.com.nsn.cumulocity.managedObject+json; charset=UTF-8; ver=0.9’ -X POST -d ‘{“c8y_IsDevice”:{},”name”:”Win10_itself_2017/01/29″}’  https://iot05.cumulocity.com/inventory/managedObjects
うーーーん、エラーだにゃーーー!
ちと、今日は風邪ひいて喉が痛いので休憩。。また今度トライ。。。
(図11)
以上

159_Data_Sending_to_Cumulocity (IoT)_from_PC_HyperV(win10)

長いな目だけど、要は自宅PC(win10)上のHyperVで動いているLinux(CentOS6.8)から、前例とおなじようにCumulocityへデータを継続的に送れるか?やってみます。

(図1)まずCentOSへ入ります。

コマンドカーソルを表示して。。。

(図2)コマンドは同じ。まずDeviceのCreateから。

(#1)
curl -v -u yoshihara20161226:Aa123456 \
   -H ‘Accept: application/vnd.com.nsn.cumulocity.managedObject+json; charset=UTF-8; ver=0.9’ \
   -H ‘Content-type: application/vnd.com.nsn.cumulocity.managedObject+json; charset=UTF-8; ver=0.9’ \
   -X POST \
   -d ‘{“c8y_IsDevice”:{},”name”:”Device2017/01/28_win10″}‘ \
   https://iot05.cumulocity.com/inventory/managedObjects

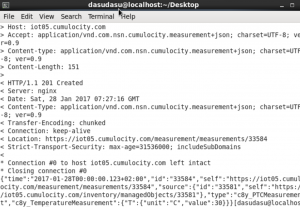
(図3)返信あり。ConnectedとかCreatedが見えればOK、、、ぽい。

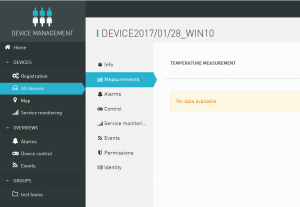
(図4)Cumulocityにはいってみると、「Device2017/01/28_win10」が見えます。当たり前だけど。。


(図5)さあ、単品でデータを送信してみる、、と。今度のIDは「33581」。ここだけ修正して、、、と。

(#2)
curl -v -u yoshihara20161226:Aa123456 \
  -H ‘Accept: application/vnd.com.nsn.cumulocity.measurement+json; charset=UTF-8; ver=0.9’ \
  -H ‘Content-type: application/vnd.com.nsn.cumulocity.measurement+json; charset=UTF-8; ver=0.9’ \
  -X POST \
  -d ‘{“c8y_TemperatureMeasurement”:{“T”:{“value”:30,”unit”:”C”}},”time”:”2017-01-28T00:00:00.123+02:00″,”source”:{“id”:”33581“},”type”:”c8y_PTCMeasurement”}’ \
  https://iot05.cumulocity.com/measurement/measurements/

さて、反応は。。。。。OKかな???

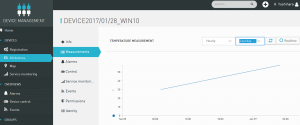
画面では、Measurementタブができているので、明日あたりデータ見えるかな??

では、Python+crontabで連続定期的ダミーデータ送信、、、にトライ。

同様に、これでいくね!!

cmd1 = “curl -v -u yoshihara20161226:A******6
cmd2 = “-H ‘Accept: application/vnd.com.nsn.cumulocity.measurement+json; charset=UTF-8; ver=0.9’ “
cmd3 = “-H ‘Content-type: application/vnd.com.nsn.cumulocity.measurement+json; charset=UTF-8; ver=0.9’ “
cmd4 = “-X POST “
cmd5 = “-d ‘{\”c8y_TemperatureMeasurement\”:{\”T\”:{\”value\”:”
cmd6 = str(temp) + “”
cmd7 = “,\”unit\”:\”C\”}},\”time\”:\””
cmd8 = str(dt_iso) +””
cmd9 = “\”,\”source\”:{\”id\”:\”33581\”},\”type\”:\”c8y_PTCMeasurement\”}’ “
cmd10 = “https://iot05.cumulocity.com/measurement/measurements/”
os.system(cmd1+cmd2+cmd3+cmd4+cmd5+cmd6+cmd7+cmd8+cmd9+cmd10)

crontabも設定しました。

*/1 * * * * python 20170128_to_cum_win10_1

さあ、様子みましょう!!


以上


158_data_sending_to_Cumulocity (IoT)2_crontab

IoTチームのために、何かお役にたてば、、とブログだけ。。
まず、Python2の復習。
エスケープシーケンスを使うのでメモ掲載、
改行とか。表は下記参考に。
(figure1)
 
で、さて、まずは、Deviceの登録をします。
マニュアルによると、「Create」から。。。。。
Linuxでのコマンドは。下記。
ID、Passをそのまま載せているけど悪さしないでね>見ている人
デバイス名は「HelloWorldDevice2017/01/24にとりあえず。
==================
(#1)
curl -v -u yoshihara20161226:A******6 \
   -H ‘Accept: application/vnd.com.nsn.cumulocity.managedObject+json; charset=UTF-8; ver=0.9’ \
   -H ‘Content-type: application/vnd.com.nsn.cumulocity.managedObject+json; charset=UTF-8; ver=0.9’ \
   -X POST \
   -d ‘{“c8y_IsDevice”:{},”name”:”HelloWorldDevice2017/01/24“}’ \
   https://iot05.cumulocity.com/inventory/managedObjects
さて、入ってみましょう! 
https://iot05.cumulocity.com/
 
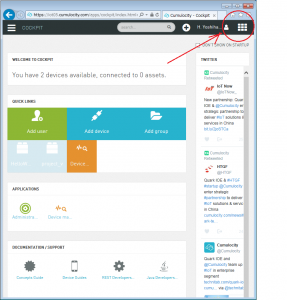
右上メニューからDeveice Managementをクリック
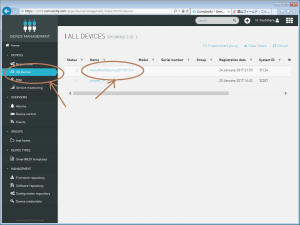
(figure 2)
connectionができれば、簡単に「dvice登録」されました!
ALLDeveicesをみると、、「HelloWorldDevice2017/01/24が登録されてます。
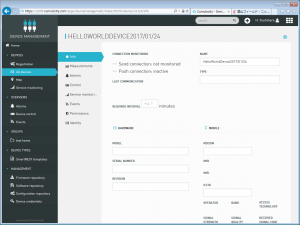
で、デバイスをクリックすると、、
デバイスのInfo画面がでます。。。
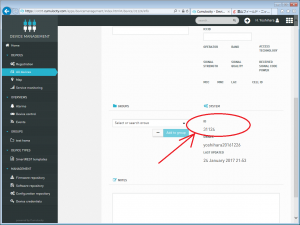
右下に下がって、そこにデバイスIDが割振りされます。
これを使って、RESTで送ると、飲み込んでくれる仕組みです。
 
さて、次にwebでdeviceのIDを「デバイスID」に設定して、
pythonファイルを作成します。。。。
==================
ID=31124  <====これが私のデバイスのID!!! 
==================
#!/usr/bin/python
# coding: UTF-8
import os
import random # モジュールのインポート
from datetime import datetime
temp=random.randint(0, 100)
#dt=datetime.now()
dt_iso=datetime.now().isoformat()
print “————————-\\”
print temp
print dt_iso
print “————————-\\”
print “curl -v -u yoshihara20161226:A******6 “
print “-H ‘Accept: application/vnd.com.nsn.cumulocity.measurement+json; charset=UTF-8; ver=0.9’ “
print “-H ‘Content-type: application/vnd.com.nsn.cumulocity.measurement+json; charset=UTF-8; ver=0.9’ “
print “-X POST “
print “-d ‘{\”c8y_TemperatureMeasurement\”:{\”T\”:{\”value\”:”
print str(temp)+ “”
print “,\”unit\”:\”C\”}},\”time\”:\””
print str(dt_iso) +””
print “\”,\”source\”:{\”id\”:\”31124\”},\”type\”:\”c8y_PTCMeasurement\”}’ “
print “https://iot05.cumulocity.com/measurement/measurements/”
print “————————–\\”
cmd1 = “curl -v -u yoshihara20161226:A******6 “
cmd2 = “-H ‘Accept: application/vnd.com.nsn.cumulocity.measurement+json; charset=UTF-8; ver=0.9’ “
cmd3 = “-H ‘Content-type: application/vnd.com.nsn.cumulocity.measurement+json; charset=UTF-8; ver=0.9’ “
cmd4 = “-X POST “
cmd5 = “-d ‘{\”c8y_TemperatureMeasurement\”:{\”T\”:{\”value\”:”
cmd6 = str(temp) + “”
cmd7 = “,\”unit\”:\”C\”}},\”time\”:\””
cmd8 = str(dt_iso) +””
cmd9 = “\”,\”source\”:{\”id\”:\”31124\”},\”type\”:\”c8y_PTCMeasurement\”}’ “
cmd10 = “https://iot05.cumulocity.com/measurement/measurements/”
os.system(cmd1+cmd2+cmd3+cmd4+cmd5+cmd6+cmd7+cmd8+cmd9+cmd10)
 
コマンドファイルができたら、送ってみます!!Pythonで実行!!
==================
pi@raspberrypi-20161228:~ $ python 20170124_pytocum1
==================
下記、表示結果のPrint。うまく行ってるみたいね!!!
————————-\
96
2017-01-24T21:43:49.023410
————————-\
curl -v -u yoshihara20161226:Aa123456
-H ‘Accept: application/vnd.com.nsn.cumulocity.measurement+json; charset=UTF-8; ver=0.9’
-H ‘Content-type: application/vnd.com.nsn.cumulocity.measurement+json; charset=UTF-8; ver=0.9’
-X POST
-d ‘{“c8y_TemperatureMeasurement”:{“T”:{“value”:
96
,”unit”:”C”}},”time”:”
2017-01-24T21:43:49.023410
“,”source”:{“id”:”31124″},”type”:”c8y_PTCMeasurement”}’
https://iot05.cumulocity.com/measurement/measurements/
————————–\
* Hostname was NOT found in DNS cache
*   Trying 52.28.26.32…
* Connected to iot05.cumulocity.com (52.28.26.32) port 443 (#0)
* successfully set certificate verify locations:
*   CAfile: none
  CApath: /etc/ssl/certs
* SSLv3, TLS handshake, Client hello (1):
* SSLv3, TLS handshake, Server hello (2):
* SSLv3, TLS handshake, CERT (11):
* SSLv3, TLS handshake, Server key exchange (12):
* SSLv3, TLS handshake, Server finished (14):
* SSLv3, TLS handshake, Client key exchange (16):
* SSLv3, TLS change cipher, Client hello (1):
* SSLv3, TLS handshake, Finished (20):
* SSLv3, TLS change cipher, Client hello (1):
* SSLv3, TLS handshake, Finished (20):
* SSL connection using TLSv1.2 / ECDHE-RSA-AES256-GCM-SHA384
* Server certificate:
* subject: C=DE; ST=Nordrhein-Westfalen; L=Duesseldorf; O=Cumulocity GmbH; CN=*.cumulocity.com
* start date: 2016-08-01 09:55:38 GMT
* expire date: 2017-08-05 10:35:38 GMT
* subjectAltName: iot05.cumulocity.com matched
* issuer: C=US; ST=Arizona; L=Scottsdale; O=GoDaddy.com, Inc.; OU=http://certs.godaddy.com/repository/; CN=Go Daddy Secure Certificate Authority – G2
* SSL certificate verify ok.
* Server auth using Basic with user ‘yoshihara20161226’
> POST /measurement/measurements/ HTTP/1.1
> Authorization: Basic eW9zaGloYXJhMjAxNjEyMjY6QWExMjM0NTY=
> User-Agent: curl/7.38.0
> Host: iot05.cumulocity.com
> Accept: application/vnd.com.nsn.cumulocity.measurement+json; charset=UTF-8; ver=0.9
> Content-type: application/vnd.com.nsn.cumulocity.measurement+json; charset=UTF-8; ver=0.9
> Content-Length: 148
>
* upload completely sent off: 148 out of 148 bytes
< HTTP/1.1 201 Created
* Server nginx is not blacklisted
< Server: nginx
< Date: Tue, 24 Jan 2017 12:43:50 GMT
< Content-Type: application/vnd.com.nsn.cumulocity.measurement+json; charset=UTF-8; ver=0.9
< Transfer-Encoding: chunked
< Connection: keep-alive
< Location: https://iot05.cumulocity.com/measurement/measurements/31108
< Strict-Transport-Security: max-age=31536000; includeSubDomains
<
* Connection #0 to host iot05.cumulocity.com left intact
{“time”:”2017-01-24T21:43:49.023Z”,”id”:”31108″,”self”:”https://iot05.cumulocity.com/measurement/measurements/31108″,”source”:{“id”:”30909″,”self”:”https://iot05.cumulocity.com/inventory/managedObjects/30909″},”type”:”c8y_PTCMeasurement”,”c8y_TemperatureMeasurement”:{“T”:{“unit”:”C”,”value”:96}}}
 
最後に、周期的やらせるため、crontabを設定。
あとは様子見。。。。。
==================
*/1 * * * * sudo python 20170124_pytocum1
==================
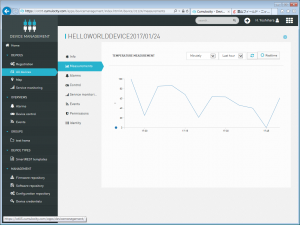
うまく出てますね!!!
ボイスSOデリバリIoTチームがんばれ!応援してます。。。。
発表会終わったら飲もう!!!
以上