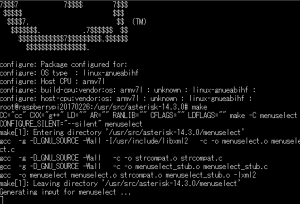
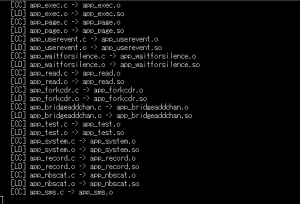
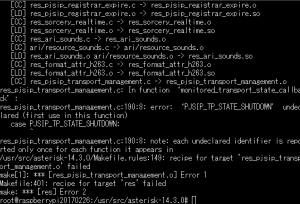
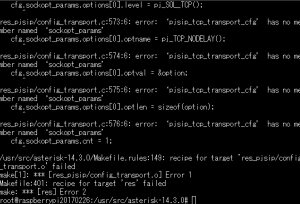
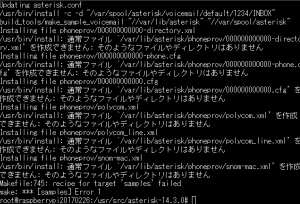
207_Raspberry Pi_Asterisk_IP電話(その1)asterisk起動でもNG

とりあえず、続けます。。。

IPアドレスの設定

/etc/network/interfacesファイル編集

– iface eth0 inet manualをコメント
– 下記のように設定を変更。これでRaspberry PiのIPアドレスが142.11.0.23固定になります。
  – iface eth0 inet static
  – address 142.11.0.23
  – network 142.11.0.0
  – netmask 255.255.0.0
  – broadcast 142.11.255.255
  – gateway 142.11.0.1

すみません。。。そのまま。。。

reboot実行。

  • 再起動後、ifconfig実行してIPアドレスが反映されていれば成功

ダメ。。。戻そう!!そのかわり実験は、192.168.0.12が固定と仮定して進める、と。

ユーザー作成

sip.confのgeneralセクションに下記の内容を追記します。ってsip.confってどこにあるんだ??ここ??--->/usr/src/asterisk-14.3.0

早くもまた躓いたーーーーー。。。。。


。。。で、今度はここを参照

http://www.st-asterisk.com/archives/81

で、、下記にあるらしい。でコピーをとれと。。。

# cd /etc/asterisk
# mv sip.conf sip.conf.bak

で、新たにsip.confをviで作成。

# vi /etc/asterisk/sip.conf

[general]
context=default
port=5060
bindaddr=0.0.0.0
srvlookup=yes
disallow=all
allow=ulaw
allow=alaw
allow=gsm
language=ja

[201]
type=friend
defaultuser=201
secret=pass
canreinvite=no
host=dynamic

[202]
type=friend
defaultuser=202
secret=pass
canreinvite=no
host=dynamic

[203]
type=friend
defaultuser=203
secret=pass
canreinvite=no
host=dynamic

AsteriskのCLIを起動して、sip.confを再読み込みするためにsip reloadを実行します。

root@(none):/home/pi# asterisk -r vvvvvc
(none)*CLI> sip reload

/usr/src/asterisk-14.3.0

かな??ダメ???じゃ。。。。

cd /etc/asterisk

cd /usr/src/asterisk-14.3.0

うーん、、ダメ!

asteriskもasterisk CLIも起動が確認できない。。。。

http://qiita.com/hasudon7171/items/925b9512f81cee46fbe3

ソフトフォンの設定

ダイヤルプラン作成

発信確認

内線通話

・・・・

に行けなかった・・・・・

もう一回、最初からかな・・・・・


以上


206_Raspberry Pi_Asterisk_IP電話(その1)apt-getでinstall

yumのインストールがまだダメ

CentOS に yum をインストール

を参考に再度トライ。。。

# wget http://mirror.centos.org/centos/6/os/x86_64/Packages/gpgme-1.1.8-3.el6.x86_64.rpm
# wget http://mirror.centos.org/centos/6/os/x86_64/Packages/pygpgme-0.1-18.20090824bzr68.el6.x86_64.rpm
# wget http://mirror.centos.org/centos/6/os/x86_64/Packages/python-iniparse-0.3.1-2.1.el6.noarch.rpm
# wget http://mirror.centos.org/centos/6/os/x86_64/Packages/python-pycurl-7.19.0-9.el6.x86_64.rpm
# wget http://mirror.centos.org/centos/6/os/x86_64/Packages/python-urlgrabber-3.9.1-11.el6.noarch.rpm
# wget http://mirror.centos.org/centos/6/os/x86_64/Packages/rpm-4.8.0-55.el6.x86_64.rpm
# wget http://mirror.centos.org/centos/6/os/x86_64/Packages/rpm-libs-4.8.0-55.el6.x86_64.rpm
# wget http://mirror.centos.org/centos/6/os/x86_64/Packages/rpm-python-4.8.0-55.el6.x86_64.rpm
# wget http://mirror.centos.org/centos/6/os/x86_64/Packages/yum-3.2.29-73.el6.centos.noarch.rpm
# wget http://mirror.centos.org/centos/6/os/x86_64/Packages/yum-metadata-parser-1.1.2-16.el6.x86_64.rpm
# wget http://mirror.centos.org/centos/6/os/x86_64/Packages/yum-plugin-fastestmirror-1.1.30-37.el6.noarch.rpm
# rpm -Uvh *.rpm
うーーーん、相変わらず有効なトポロジーがない、と怒られる。。。
難しいなあ。。
そこで。。。。。
http://www.voip-info.jp/index.php/Raspberry_Pi_Asterisk
を参考に、Raspberry Pi Asterisk
をやってみる。。。か。。
Raspberry Piの起動とログインと初期設定
# sudo raspi-config
でもこれはいじらず。。
不足しているパッケージの追加
# apt-get install ncurses-dev libxml2 libxml2-dev sqlite libsqlite3-dev libssl-dev
 UUID
Asterisk 11以降、uuidを必要とするバージョンでは以下も追加します。
 # apt-get install uuid uuid-runtime uuid-dev

JSONAsterisk 13以降、JSONを必要とするバージョンでは以下も追加します。

# apt-get install libjansson4 libjansson-dev

PJSIPを使う場合

# apt-get install libpjsip-simple2 libpjsip-ua2 libpjsip2 libpjproject-dev libsrtp-dev srtp-utils

MP3を使う場合そのままではSubversionが入っていないので失敗するため

# apt-get install subversion

Asteriskのコンパイル

以上で”普通に”Asteriskがコンパイルできるはずなので

./configure
make

を実行してみてください。・・・・ダメ??

では、戻ってソースの入手へ。

ソースの入手

Asterisk 11のソースは以下から。展開するディレクトリはどこでもかまいませんが、ここでは/usr/src/とします。

# cd /usr/src
# wget http://downloads.asterisk.org/pub/telephony/asterisk/asterisk-14.3.0.tar.gz

入手したら展開しておきます。以降それぞれの作業は、それぞれの展開したサブディレクトリで行います。

# tar zxvf asterisk-14.3.0.tar.gz
# cd asterisk-14.3.0

Asteriskのコンパイルとインストール

基本的にconfigureしてmakeするだけです。

# ./configure
# make

(なんかやっとる。。。。)

まだ、、、続いてます。。。

ん??エラー出たな??

まあ、続けます。考えてもわからないので。。。すみません。。。
# make install

またエラー出ました。。。でもわからないので続けます。。すみません。


# make samples

またエラー。。。。ダメかな??

# make config

これで新規インストールは完了します。最後の make config で起動時に自動起動するようになります。
なおAsteriskでもmake menuselectがサポートされておりコンパイルするモジュールを選択したり組み込むモジュールを選択することができるようになっています。。。。と。??

以上

205_Raspberry Pi_Asterisk_IP電話(その1)

Qiita参考です。そんな事できるの?・・・で、そのまま実験。

http://qiita.com/hasudon7171/items/925b9512f81cee46fbe3

私の場合、すでにPasPi、ケーブル、Winマシン、OSのインストールまでできているので、Asteriskのインストールから。

で、Asteriskのインストール

コマンドプロンプトで「ipconfig」を実行して使用しているPCのIPアドレスを確認します。自分のWin10は192.168.0.10でした。
Raspberry PiもIPアドレスを確認。2号機は192.168.0.12。

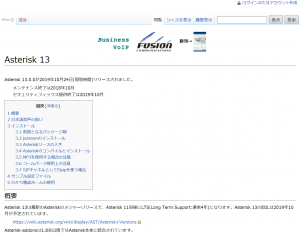
AsteriskのインストールはAsterisk 13 – VOIP-Info.jp Wikiを参照。なので、飛びます。

Fusionから提供されてるのか。。。

(図1)


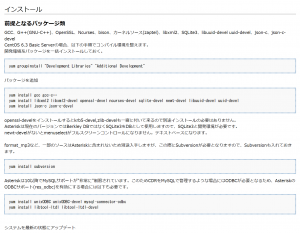
インストールの部分へ。

(図2)


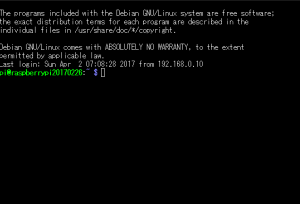
TeraTermでコマンド操作します。RaspPiに接続。

(図3)

# yum groupinstall “Development Libraries” “Additional Development”

と思ったらyumが使えない。インストールが必要か。。http://makizou.com/1259/を参照。ダウンロード先はこちら。

http://vault.centos.org/4.4/os/i386/CentOS/RPMS/

では、、、、(そのまま)
# cd /usr/local/src/
# wget http://vault.centos.org/4.4/os/i386/CentOS/RPMS/python-elementtree-1.2.6-4.2.1.i386.rpm
# wget http://vault.centos.org/4.4/os/i386/CentOS/RPMS/sqlite-3.3.3-1.2.i386.rpm
# wget http://vault.centos.org/4.4/os/i386/CentOS/RPMS/sqlite-devel-3.3.3-1.2.i386.rpm
# wget http://vault.centos.org/4.4/os/i386/CentOS/RPMS/python-sqlite-1.1.7-1.2.i386.rpm
# wget http://vault.centos.org/4.4/os/i386/CentOS/RPMS/python-urlgrabber-2.9.8-2.noarch.rpm
# wget http://vault.centos.org/4.4/os/i386/CentOS/RPMS/yum-2.4.3-1.c4.noarch.rpm
# rpm -ihv python-elementtree-1.2.6-4.2.1.i386.rpm
# rpm -ihv sqlite-3.3.3-1.2.i386.rpm
# rpm -ihv sqlite-devel-3.3.3-1.2.i386.rpm
# rpm -ihv python-sqlite-1.1.7-1.2.i386.rpm
# rpm -ihv python-urlgrabber-2.9.8-2.noarch.rpm
# rpm --import http://vault.centos.org/4.4/os/i386/RPM-GPG-KEY-centos4
# rpm -ihv yum-2.4.3-1.c4.noarch.rpm

うーーーん、yumもrpmもコマンドが無い!、、、と。インストールか。。。コマンドは??

# sudo apt-get install rpm

# sudo apt-get install yum

かな?

だめかあ。。。なんかrepolistがゼロっていうのがまずいみたい。。。

ちょっとおでかけなので休止・・・・・

以上


204_Raspi_水分センサ_(last code)

水分センサのpythonコード(2ファイル)をそのまま。。。


①水分センサの測定用、ADCを介したpython

(adafruit_mcp3008_3.py)

————————————-

#!/usr/bin/env python
# -*- coding: utf-8 -*

# Written by Limor “Ladyada” Fried for Adafruit Industries, (c) 2015
# This code is released into the public domain
# import module
import time
import os
import RPi.GPIO as GPIO

import random # モジュールのインポート

# ドライバをimport
import mysql.connector

if __name__ == ‘__main__’:
# データベースに接続

# localhost access ok!!!!!
connect = mysql.connector.connect(user=’root’, password=’root’, host=’localhost’, database=’moisture_sensor’, charset=’utf8′)

cursor = connect.cursor()

# temp=random.randint(0, 50)
# humid=random.randint(0, 100)
GPIO.setmode(GPIO.BCM)
DEBUG = 1

# read SPI data from MCP3008 chip, 8 possible adc’s (0 thru 7)
def readadc(adcnum, clockpin, mosipin, misopin, cspin):
if ((adcnum > 7) or (adcnum < 0)):
return -1
GPIO.output(cspin, True)

GPIO.output(clockpin, False)  # start clock low
GPIO.output(cspin, False)     # bring CS low

commandout = adcnum
commandout |= 0x18  # start bit + single-ended bit
commandout <<= 3    # we only need to send 5 bits here
for i in range(5):
if (commandout & 0x80):
GPIO.output(mosipin, True)
else:
GPIO.output(mosipin, False)
commandout <<= 1
GPIO.output(clockpin, True)
GPIO.output(clockpin, False)

adcout = 0
# read in one empty bit, one null bit and 10 ADC bits
for i in range(12):
GPIO.output(clockpin, True)
GPIO.output(clockpin, False)
adcout <<= 1
if (GPIO.input(misopin)):
adcout |= 0x1

GPIO.output(cspin, True)

adcout >>= 1       # first bit is ‘null’ so drop it
return adcout

# change these as desired – they’re the pins connected from the
# SPI port on the ADC to the Cobbler
SPICLK = 18
SPIMISO = 23
SPIMOSI = 24
SPICS = 25
# set up the SPI interface pins
GPIO.setup(SPIMOSI, GPIO.OUT)
GPIO.setup(SPIMISO, GPIO.IN)
GPIO.setup(SPICLK, GPIO.OUT)
GPIO.setup(SPICS, GPIO.OUT)

# 10k trim pot connected to adc #0
potentiometer_adc = 0;

last_read = 0       # this keeps track of the last potentiometer value
tolerance = 5       # to keep from being jittery we’ll only change
# volume when the pot has moved more than 5 ‘counts’

n=1
#while n<=1:

if (n == 1):
# we’ll assume that the pot didn’t move
trim_pot_changed = False

# read the analog pin
trim_pot = readadc(potentiometer_adc, SPICLK, SPIMOSI, SPIMISO, SPICS)
# how much has it changed since the last read?
pot_adjust = abs(trim_pot – last_read)

if DEBUG:
print “trim_pot:”, trim_pot
print “pot_adjust:”, pot_adjust
print “last_read”, last_read

if ( pot_adjust > tolerance ):
trim_pot_changed = True

if DEBUG:
print “trim_pot_changed”, trim_pot_changed

if ( trim_pot_changed ):
set_volume = trim_pot / 10.24           # convert 10bit adc0 (0-1024) trim pot read into 0-100 volume level
set_volume = round(set_volume)          # round out decimal value
set_volume = int(set_volume)            # cast volume as integer

print ‘Volume = {volume}%’ .format(volume = set_volume)
set_vol_cmd = ‘sudo amixer cset numid=1 — {volume}% > /dev/null’ .format(volume = set_volume)
os.system(set_vol_cmd)  # set volume

if DEBUG:
print “set_volume”, set_volume
print “tri_pot_changed”, set_volume

# save the potentiometer reading for the next loop
last_read = trim_pot
# insert

cursor.execute(‘insert into ms_tbl(time_stamp,adc,read_adc,volts,comment,trim_pot,pot_adjust,last_read,trim_pot_changed,set_volume) values (now(),%s ,%s, %s, %s, %s, %s, %s, %s, %s)’, (trim_pot,set_volume,’taniku_pot2017/03/25′,’comment2017/03/25′,trim_pot,pot_adjust,last_read,trim_pot_changed,set_volume))
# Delete
cursor.execute(‘DELETE FROM ms_tbl ORDER BY Num ASC LIMIT 1’)

# autocommitではないので、明示的にコミットする
connect.commit()

# データベースから切断
cursor.close()
connect.close()
# hang out and do nothing for a half second
# time.sleep(0.10)


②RaspiのデータをさくらVPSへ転送、pythonコード

(20170323_snd_skr_ms1.py)

————————————-

#!/usr/bin/env python
# -*- coding: utf-8 -*-
# import module
import os
import random # モジュールのインポート
# ドライバをimport
import mysql.connector
if __name__ == ‘__main__’:
# データベースに接続
# localhost access ok!!!!!
connect = mysql.connector.connect(user=’root’, password=’root’, host=’localhost’, database=’moisture_sensor’, charset=’utf8′)
cursor = connect.cursor()
# select
cursor.execute(‘select * from ms_tbl order by Num DESC limit 1′)
rows = cursor.fetchall()
# 出力
for i in rows:
print(“—send below data to sakravps success !!—-“)
print(i[0])
print(i[1])
print(i[2])
print(i[3])
print(i[4])
print(i[5])
print(i[6])
print(i[7])
print(i[8])
print(i[9])
print(i[10])

# sakuravps access
connect = mysql.connector.connect(user=’raspai’, password=’Aa123456′, host=’160.16.50.187′, database=’20170301_moisture_sensor’, charset=’utf8′)
cursor = connect.cursor()

# insert
cursor.execute(‘insert into ms_tbl(time_stamp,adc,read_adc,volts,comment,trim_pot,pot_adjust,last_read,trim_pot_changed,set_volume) values (%s, %s, %s, %s, %s, %s, %s, %s ,%s, %s)’, (i[1],i[2],i[3],i[4],i[5],i[6],i[7],i[8],i[9],i[10]))
# cursor.execute(‘insert into ms_tbl(time_stamp,adc,read_adc,volts,comment) values (%s, %s, %s, %s, %s)’, (i[1],i[2],i[3],i[4],i[5]))

# Delete
cursor.execute(‘DELETE FROM ms_tbl ORDER BY Num ASC LIMIT 1’)
# autocommitではないので、明示的にコミットする
connect.commit()
# データベースから切断
cursor.close()
connect.close()


以上

203_Raspi_温度センサ+水分センサ_1台集約

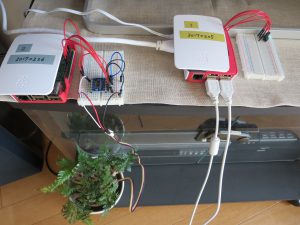
Raspiの一号機に「温度センサ+水分センサ」を集約しました。


■Before、それぞれで測定中。。。


水分センサ。。。


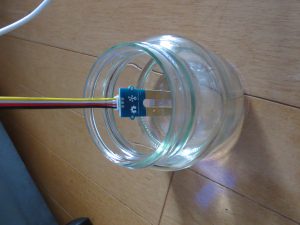
温度センサ。。。。(湿度計は復活しなかった・・・)


■After 合体!1台で両方を計測中。。。。

まあ、問題ないかな??

ちょっと、Raspiの負荷が心配ですが。。。。

以上


202_水分センサ_グラフMySQLのdataそのもの表示

一応、さくらVPSのMySQLデータを確認するためのphpコードも。

置き場所は、

/var/www/html/mois_gra

コードは、下記

ーーーーーーーーーーーーーーーーーーーーーーーーーーーーーーーーーーーー

?php
//MySQLに接続し、データベースを選択します。
mysql_select_db(‘20170301_moisture_sensor’) or die(mysql_error());

//SQLクエリを実行します。
//SQLクエリを実行します。(カウント追加2016/12/30)
$res1 = mysql_query(‘SELECT count(*) from ms_tbl ‘) or die(mysql_error());
//結果を出力します。
while ($row1 = mysql_fetch_array($res1, MYSQL_NUM)){
echo “vpsのms_tbl件数は、<br />\n”;
echo $row1[0].”\t”;
echo “<br />件です。<br />\n”;
echo “——————\n<br>”;
}
while ($row = mysql_fetch_array($res, MYSQL_NUM)){
echo $row[0].”\t”;
echo $row[1].”\t”;
echo $row[2].”\n”;
echo $row[3].”\n”;
echo $row[4].”\n”;
echo $row[5].”\n”;
echo $row[6].”\t”;
echo $row[7].”\n”;
echo $row[8].”\n”;
echo $row[9].”\n”;
echo $row[10].”\n”;
echo “<br />\n”;
echo “——————\n<br>”;
}
//結果セットを開放し、接続を閉じます。
mysql_free_result($res);
mysql_close($conn);
?>

201_水分センサ_グラフWebコード

さくらVPSでグラフ表のWebコードです。

置き場所は、

/var/www/html/mois_gra

コードは、下記

————————————

    <!– AJAX API のロード –>
    // グラフ作成用のコールバック関数
    function drawChart() {
    // データテーブルの作成
    var data = google.visualization.arrayToDataTable([
       mysql_select_db(‘20170301_moisture_sensor’) or die(mysql_error());
       //SQLクエリを実行します。
      //$drawScript ='<br>グラフデーターを書くまでの記述<br>’;
       $i = 0;
       while ($row = mysql_fetch_array($res, MYSQL_NUM)){
       if ($i != 0) {
       } else {
       }
        print $drawScript;
        //結果セットを開放し、接続を閉じます。
        mysql_free_result($res);
        mysql_close($conn);
       ?>
   ]);
    // グラフのオプションを設定
    var options = {
        title: ‘moisture_sensor用グラフ’
    };
    // LineChart のオブジェクトの作成
    // データテーブルとオプションを渡して、グラフを描画
    chart.draw(data, options);
    }
    </script>
  </head>
  <body>
    <!– グラフを描く div 要素 –>
    <div id=”chart_div” style=”width: 80%; height: 400px;”></div>
     参考値<br>
    —————————-<br>
     肉葉植物     470-490 , 47-49<br>
    —————————-<br>
     胡蝶蘭(小) 437-? , 43-? <br>
    —————————-<br>
     ゴムの木     389-? , 38-? <br>
    —————————-<br>
    <br>
    表示データ<br>
    *****************************<br>
    [Num, time_stamp, adc, read_adc, volts, comment ] <br>
   <?php
    //MySQLに接続し、データベースを選択します。
    mysql_select_db(‘20170301_moisture_sensor’) or die(mysql_error());
    //SQLクエリを実行します。
    //結果を出力します。
    while ($row = mysql_fetch_array($res, MYSQL_NUM)){
    echo “[\n”;
    echo $row[0].”\n”;
    echo “,\n'”;
    echo $row[1].”\t”;
    echo “‘,\n”;
    echo $row[2].”\n”;
    echo “,\n”;
    echo $row[3].”\n”;
    echo “,\n”;
    echo $row[4].”\n”;
    echo “,\n”;
    echo $row[5].”\n”;
    echo “],\n”;
    echo “<br />\n”;
    }
    //結果セットを開放し、接続を閉じます。
    mysql_free_result($res);
    mysql_close($conn);
   ?>
    *****************************<br>
  </body>
</html>

200_水分センサ_sampleコードそのもの(勉強)

adafruit_mcp3008.py
====================
#!/usr/bin/env python

# Written by Limor “Ladyada” Fried for Adafruit Industries, (c) 2015
# This code is released into the public domain

import time
import os
import RPi.GPIO as GPIO

GPIO.setmode(GPIO.BCM)
DEBUG = 1

# read SPI data from MCP3008 chip, 8 possible adc’s (0 thru 7)
def readadc(adcnum, clockpin, mosipin, misopin, cspin):
if ((adcnum > 7) or (adcnum < 0)):
return -1
GPIO.output(cspin, True)

GPIO.output(clockpin, False)  # start clock low
GPIO.output(cspin, False)     # bring CS low

commandout = adcnum
commandout |= 0x18  # start bit + single-ended bit
commandout <<= 3    # we only need to send 5 bits here
for i in range(5):
if (commandout & 0x80):
GPIO.output(mosipin, True)
else:
GPIO.output(mosipin, False)
commandout <<= 1
GPIO.output(clockpin, True)
GPIO.output(clockpin, False)

adcout = 0
# read in one empty bit, one null bit and 10 ADC bits
for i in range(12):
GPIO.output(clockpin, True)
GPIO.output(clockpin, False)
adcout <<= 1
if (GPIO.input(misopin)):
adcout |= 0x1

GPIO.output(cspin, True)

adcout >>= 1       # first bit is ‘null’ so drop it
return adcout

# change these as desired – they’re the pins connected from the
# SPI port on the ADC to the Cobbler
SPICLK = 18
SPIMISO = 23
SPIMOSI = 24
SPICS = 25
# set up the SPI interface pins
GPIO.setup(SPIMOSI, GPIO.OUT)
GPIO.setup(SPIMISO, GPIO.IN)
GPIO.setup(SPICLK, GPIO.OUT)
GPIO.setup(SPICS, GPIO.OUT)

# 10k trim pot connected to adc #0
potentiometer_adc = 0;

last_read = 0       # this keeps track of the last potentiometer value
tolerance = 5       # to keep from being jittery we’ll only change
# volume when the pot has moved more than 5 ‘counts’

while True:
# we’ll assume that the pot didn’t move
trim_pot_changed = False

# read the analog pin
trim_pot = readadc(potentiometer_adc, SPICLK, SPIMOSI, SPIMISO, SPICS)
# how much has it changed since the last read?
pot_adjust = abs(trim_pot – last_read)

if DEBUG:
print “trim_pot:”, trim_pot
print “pot_adjust:”, pot_adjust
print “last_read”, last_read

if ( pot_adjust > tolerance ):
trim_pot_changed = True

if DEBUG:
print “trim_pot_changed”, trim_pot_changed

if ( trim_pot_changed ):
set_volume = trim_pot / 10.24           # convert 10bit adc0 (0-1024) trim pot read into 0-100 volume level
set_volume = round(set_volume)          # round out decimal value
set_volume = int(set_volume)            # cast volume as integer

print ‘Volume = {volume}%’ .format(volume = set_volume)
set_vol_cmd = ‘sudo amixer cset numid=1 — {volume}% > /dev/null’ .format(volume = set_volume)
os.system(set_vol_cmd)  # set volume

if DEBUG:
print “set_volume”, set_volume
print “tri_pot_changed”, set_volume

# save the potentiometer reading for the next loop
last_read = trim_pot

# hang out and do nothing for a half second
time.sleep(0.5)
====================


199_水分センサ_sampleコードで試し

いよいよ水分センサ。

コードはそのまま使います。(まずは準備)

————————-

Python sample code getting from Web
 
$ git clone git://gist.github.com/3151375.git
 
you find new directory “3151375”
In i tyou find python sample code “adafruit_mcp3008.py”
 
I will use this code itself.


before that, I need set up other package and so on.
 
 
Necessary Packages
$ sudo apt-get update
$ sudo apt-get install python-dev
 
Next, Install the latest RPi.GPIO module. We will use easy_install to manage the python packages.
 
$ sudo apt-get install python-setuptools
$ sudo easy_install rpi.gpio
 
 
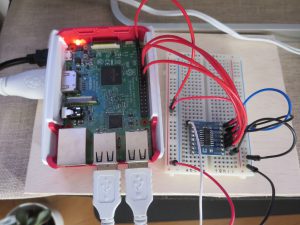
Connect between RaspberryPi and this mousture curcuit.
Let’s get started!
 
$ cd 3151375
$ sudo python adafruit_mcp3008.py

————————-

結果は、

(1)taniku-pot-mad   355
(2)ko-cyou-ran case 422
(3)water case       501
(4)dry case           0
(5)shida-tree case  152

測定周期やMySQL保存はこの次に。

はたして・・・

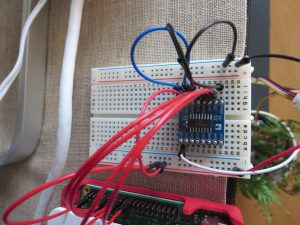
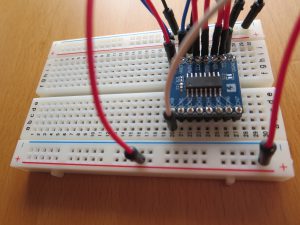
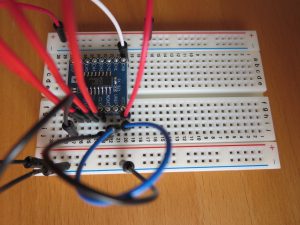
まずは、配線完了!!

(1)まずは、多肉植物、から。。


=============
taniku-pot-mad case 
————-
pi@raspberrypi20170226:~/3151375 $ sudo python adafruit_mcp3008.py
adafruit_mcp3008.py:56: RuntimeWarning: This channel is already in use, continuing anyway.  Use GPIO.setwarnings(False) to disable warnings.
  GPIO.setup(SPIMOSI, GPIO.OUT)
adafruit_mcp3008.py:58: RuntimeWarning: This channel is already in use, continuing anyway.  Use GPIO.setwarnings(False) to disable warnings.
  GPIO.setup(SPICLK, GPIO.OUT)
adafruit_mcp3008.py:59: RuntimeWarning: This channel is already in use, continuing anyway.  Use GPIO.setwarnings(False) to disable warnings.
  GPIO.setup(SPICS, GPIO.OUT)
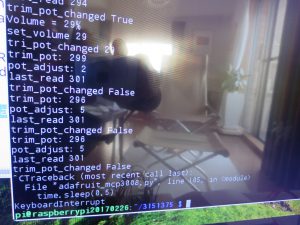
trim_pot: 349
pot_adjust: 349
last_read 0
trim_pot_changed True
Volume = 34%
set_volume 34
tri_pot_changed 34
trim_pot: 356
pot_adjust: 7
last_read 349
trim_pot_changed True
Volume = 35%
set_volume 35
tri_pot_changed 35
trim_pot: 354
pot_adjust: 2
last_read 356
trim_pot_changed False
trim_pot: 355
pot_adjust: 1
last_read 356
trim_pot_changed False
trim_pot: 356
pot_adjust: 0
last_read 356
trim_pot_changed False
trim_pot: 356
pot_adjust: 0
last_read 356
trim_pot_changed False
trim_pot: 356
pot_adjust: 0
last_read 356
trim_pot_changed False
trim_pot: 354
pot_adjust: 2
last_read 356
trim_pot_changed False
^CTraceback (most recent call last):
  File “adafruit_mcp3008.py”, line 105, in <module>
    time.sleep(0.5)
KeyboardInterrupt

(2)次は、胡蝶蘭

=============
ko-cyou-ran case 
————-
pi@raspberrypi20170226:~/3151375 $ sudo python adafruit_mcp3008.py
adafruit_mcp3008.py:56: RuntimeWarning: This channel is already in use, continuing anyway.  Use GPIO.setwarnings(False) to disable warnings.
  GPIO.setup(SPIMOSI, GPIO.OUT)
adafruit_mcp3008.py:58: RuntimeWarning: This channel is already in use, continuing anyway.  Use GPIO.setwarnings(False) to disable warnings.
  GPIO.setup(SPICLK, GPIO.OUT)
adafruit_mcp3008.py:59: RuntimeWarning: This channel is already in use, continuing anyway.  Use GPIO.setwarnings(False) to disable warnings.
  GPIO.setup(SPICS, GPIO.OUT)
trim_pot: 422
pot_adjust: 422
last_read 0
trim_pot_changed True
Volume = 41%
set_volume 41
tri_pot_changed 41
trim_pot: 427
pot_adjust: 5
last_read 422
trim_pot_changed False
trim_pot: 425
pot_adjust: 3
last_read 422
trim_pot_changed False
trim_pot: 424
pot_adjust: 2
last_read 422
trim_pot_changed False
trim_pot: 424
pot_adjust: 2
last_read 422
trim_pot_changed False
trim_pot: 424
pot_adjust: 2
last_read 422
trim_pot_changed False
trim_pot: 425
pot_adjust: 3
last_read 422
trim_pot_changed False
trim_pot: 426
pot_adjust: 4
last_read 422
trim_pot_changed False
^CTraceback (most recent call last):
  File “adafruit_mcp3008.py”, line 105, in <module>
    time.sleep(0.5)
KeyboardInterrupt


(3)次は、水だけ(水100%)

=============
water case 
————-
pi@raspberrypi20170226:~/3151375 $ sudo python adafruit_mcp3008.py
adafruit_mcp3008.py:56: RuntimeWarning: This channel is already in use, continuing anyway.  Use GPIO.setwarnings(False) to disable warnings.
  GPIO.setup(SPIMOSI, GPIO.OUT)
adafruit_mcp3008.py:58: RuntimeWarning: This channel is already in use, continuing anyway.  Use GPIO.setwarnings(False) to disable warnings.
  GPIO.setup(SPICLK, GPIO.OUT)
adafruit_mcp3008.py:59: RuntimeWarning: This channel is already in use, continuing anyway.  Use GPIO.setwarnings(False) to disable warnings.
  GPIO.setup(SPICS, GPIO.OUT)
trim_pot: 501
pot_adjust: 501
last_read 0
trim_pot_changed True
Volume = 49%
set_volume 49
tri_pot_changed 49
trim_pot: 501
pot_adjust: 0
last_read 501
trim_pot_changed False
trim_pot: 503
pot_adjust: 2
last_read 501
trim_pot_changed False
trim_pot: 503
pot_adjust: 2
last_read 501
trim_pot_changed False
trim_pot: 503
pot_adjust: 2
last_read 501
trim_pot_changed False
trim_pot: 504
pot_adjust: 3
last_read 501
trim_pot_changed False
trim_pot: 501
pot_adjust: 0
last_read 501
trim_pot_changed False
^CTraceback (most recent call last):
  File “adafruit_mcp3008.py”, line 105, in <module>
    time.sleep(0.5)
KeyboardInterrupt

(4)まったく挿さないのは。。。

=============
dry case 
————-
pi@raspberrypi20170226:~/3151375 $ sudo python adafruit_mcp3008.py
adafruit_mcp3008.py:56: RuntimeWarning: This channel is already in use, continuing anyway.  Use GPIO.setwarnings(False) to disable warnings.
  GPIO.setup(SPIMOSI, GPIO.OUT)
adafruit_mcp3008.py:58: RuntimeWarning: This channel is already in use, continuing anyway.  Use GPIO.setwarnings(False) to disable warnings.
  GPIO.setup(SPICLK, GPIO.OUT)
adafruit_mcp3008.py:59: RuntimeWarning: This channel is already in use, continuing anyway.  Use GPIO.setwarnings(False) to disable warnings.
  GPIO.setup(SPICS, GPIO.OUT)
trim_pot: 0
pot_adjust: 0
last_read 0
trim_pot_changed False
trim_pot: 0
pot_adjust: 0
last_read 0
trim_pot_changed False
trim_pot: 0
pot_adjust: 0
last_read 0
trim_pot_changed False
trim_pot: 0
pot_adjust: 0
last_read 0
trim_pot_changed False
trim_pot: 0
pot_adjust: 0
last_read 0
trim_pot_changed False
trim_pot: 0
pot_adjust: 0
last_read 0
trim_pot_changed False
trim_pot: 0
pot_adjust: 0
last_read 0
trim_pot_changed False
trim_pot: 0
pot_adjust: 0
last_read 0
trim_pot_changed False
trim_pot: 0
pot_adjust: 0
last_read 0
trim_pot_changed False
^CTraceback (most recent call last):
  File “adafruit_mcp3008.py”, line 105, in <module>
    time.sleep(0.5)
KeyboardInterrupt

(5)シダ植物は・・・

=============
shida-tree case 
————-
pi@raspberrypi20170226:~/3151375 $ sudo python adafruit_mcp3008.py
adafruit_mcp3008.py:56: RuntimeWarning: This channel is already in use, continuing anyway.  Use GPIO.setwarnings(False) to disable warnings.
  GPIO.setup(SPIMOSI, GPIO.OUT)
adafruit_mcp3008.py:58: RuntimeWarning: This channel is already in use, continuing anyway.  Use GPIO.setwarnings(False) to disable warnings.
  GPIO.setup(SPICLK, GPIO.OUT)
adafruit_mcp3008.py:59: RuntimeWarning: This channel is already in use, continuing anyway.  Use GPIO.setwarnings(False) to disable warnings.
  GPIO.setup(SPICS, GPIO.OUT)
trim_pot: 150
pot_adjust: 150
last_read 0
trim_pot_changed True
Volume = 15%
set_volume 15
tri_pot_changed 15
trim_pot: 151
pot_adjust: 1
last_read 150
trim_pot_changed False
trim_pot: 156
pot_adjust: 6
last_read 150
trim_pot_changed True
Volume = 15%
set_volume 15
tri_pot_changed 15
trim_pot: 154
pot_adjust: 2
last_read 156
trim_pot_changed False
trim_pot: 151
pot_adjust: 5
last_read 156
trim_pot_changed False
trim_pot: 154
pot_adjust: 2
last_read 156
trim_pot_changed False
trim_pot: 152
pot_adjust: 4
last_read 156
trim_pot_changed False
^CTraceback (most recent call last):
  File “adafruit_mcp3008.py”, line 105, in <module>
    time.sleep(0.5)
KeyboardInterrupt

以上、  さあ、次はカスタマイズ・・・・・・


198_水分センサ_半田ごて

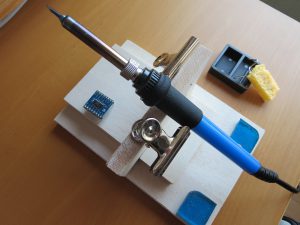
さあ、半田ごてです。久しぶり。。。


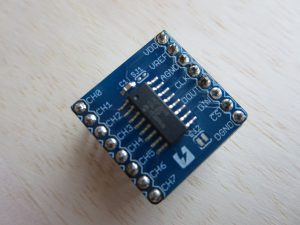
完成品チェック!


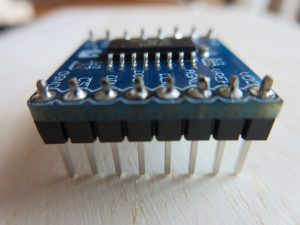
側面A、、まあまあかな???


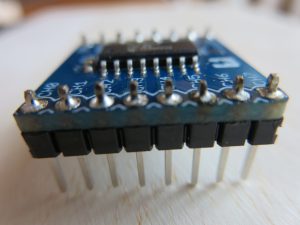
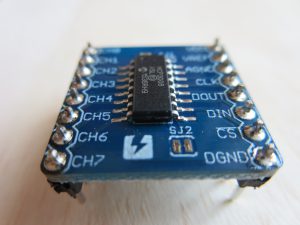
側面B、うーーーーん、まあままかな???


まあ、、動けばいいよね???


以上