[0314]_Azure_API_2写真のcompare_1★

import httplib, urllib, base64, json

###############################################
#### Update or verify the following values. ###
###############################################

# Replace the subscription_key string value with your valid subscription key.
subscription_key = ’13hc777******************8df7156′

# Replace or verify the region.
#
# You must use the same region in your REST API call as you used to obtain your subscription keys.
# For example, if you obtained your subscription keys from the westus region, replace
# “westcentralus” in the URI below with “westus”.
#
# NOTE: Free trial subscription keys are generated in the westcentralus region, so if you are using
# a free trial subscription key, you should not need to change this region.
uri_base = ‘westcentralus.api.cognitive.microsoft.com’

# Request headers.
headers = {
‘Content-Type’: ‘application/json’,
‘Ocp-Apim-Subscription-Key’: ‘91723b******************36914b9’,
}

# Request parameters.
params = urllib.urlencode({
‘returnFaceId’: ‘true’,
‘returnFaceLandmarks’: ‘false’,
‘returnFaceAttributes’: ‘age,gender,headPose,smile,facialHair,glasses,emotion,hair,makeup,occlusion,accessories,blur,exposure,noise’,
})

# The URL of a JPEG image to analyze.
#body = “{‘url’:’http://153.126.******************_20170731/files/20110826oresama.JPG’}”
#body = “{‘url’:’http://153.126.******************20170731/files/1448158857484.jpg’}”
#body = “{‘url’:’http://153.126.******************/20110826文子.JPG’}”
#★(1)2つのfaceIdをbodyに入れる★#
body = “{‘faceId1’: ‘c2d3eb1f-*************786a5f851’ , ‘faceId2’: ‘1a58f491-d***************-b25d-f5375ed6f6c3’}”

try:
# Execute the REST API call and get the response.
conn = httplib.HTTPSConnection(‘westcentralus.api.cognitive.microsoft.com’)
# conn.request(“POST”, “/face/v1.0/detect?%s” % params, body, headers)
#★(2)detect?%をverify?にする★#
conn.request(“POST”, “/face/v1.0/verify?%s” % params, body, headers)
response = conn.getresponse()
data = response.read()

# ‘data’ contains the JSON data. The following formats the JSON data for display.
parsed = json.loads(data)
print (“Response:”)
print (json.dumps(parsed, sort_keys=True, indent=2))
conn.close()

except Exception as e:
print(“[Errno {0}] {1}”.format(e.errno, e.strerror))

*************************
https://azure.microsoft.com/ja-jp/services/cognitive-services/face/
*************************
https://westus.dev.cognitive.microsoft.com/docs/services/563879b61984550e40cbbe8d/operations/563879b61984550f3039523a
*************************

*************************
http://153.126.154.******************/files/20110826oresama.JPG
“faceId1”: “c2d3eb1f-8798-43e5-bf75-fa9786a5f851”
http://153.126.154.******************170731/files/1448158857484.jpg
“faceId2”: “1a58f491-******************-b25d-f5375ed6f6c3”

あれ??あっさり出た??★★★★
[root@ik1-313-16602 verify_20170828]# python 20170828_veri3.py
Response:
{
“confidence”: 0.79488,
“isIdentical”: true
}

*************************
違う写真使ってみる。
python 20170828_veri4.py
body = “{‘url’:’http://153.126.154.106/photo_check_20170731/files/20170828_oosawa.jpg’}”
“faceId”: “c27dc17c-******************-f457db090cfc”,
これを比べる、、と????★★★★
[root@ik1-313-16602 verify_20170828]# python ******************comp.py
Response:
{
“confidence”: 0.24269,
“isIdentical”: false
}
おおお!違う、、、と!OKやな!

*************************
作業場所
/var/www/html/verify_20170828
ファイルたち
-rw-r–r– 1 root root 1917 8月 28 21:19 2017 20170828_veri1.py
-rw-r–r– 1 root root 1915 8月 28 21:25 2017 20170828_veri2.py
-rw-r–r– 1 root root 2195 8月 28 21:34 2017 20170828_veri3_comp.py
-rw-r–r– 1 root root 2005 8月 28 21:44 2017 20170828_veri4.py
-rw-r–r– 1 root root 2308 8月 28 21:48 2017 20170828_veri5_comp.py
*************************

[0313]_Raspai監視カメラの起動(久しぶり)★

久しくアクセスしなかったので。。
停電で止まってた。。。
起動コマンド何だっけ・・・・で。
備忘録!

Raspai監視カメラの起動は、
どちらも
# cd /var/www/html/jpg
# motion
でOK

写真の保存フォルダは、
どちらも
/var/www/html/jpg

以上

[0312]_AI/API_表示リストを新規id降順に表示する★

[0312]
表示リストを新規id降順に表示する

***********************
<基本形>
***********************
$sql2 = ‘SELECT * FROM vision_t_20170821 ORDER BY id DESC’;
***********************
対応済みURL
【1】Google Cloud Vision
/php_photo_20170318

http://dasudasu.sakura.ne.jp/php_photo_20170318/20170823_list.php

$sql2 = ‘SELECT * FROM vision_t_20170821’;

$sql2 = ‘SELECT * FROM vision_t_20170821 ORDER BY id DESC’;

【2】Emotion(Azure)・・失礼これはこのままでOKだった、変更不要
/var/www/html/photo_check_20170731

http://153.126.154.106/photo_check_20170731/20170809_rank_test.php

$sql3 = ‘SELECT rank FROM emo_list_rank WHERE (id = (select MAX( id ) from emo_list))’;

$sql3 = ‘SELECT rank FROM emo_list_rank WHERE (id = (select MAX( id ) from emo_list)) ORDER BY id DESC’;

【3】Google OCR・・・OK!
/var/www/html/OCR_20170820

http://153.126.154.106/OCR_20170820/20170821_list.php

$sql4 = ‘select * from OCR_t_20170821’;

$sql4 = ‘select * from OCR_t_20170821 ORDER BY id DESC’;

以上

[0311]_AI/API表示リストに画像ファイルのリンクを張る★

[0311]
表示リストに画像ファイルのリンクを張る

***********************
<基本形>
***********************
print(‘

‘.’‘.”.$result2[2].’

‘);
***********************
対応済みURL
【1】Google Cloud Vision
http://dasudasu.sakura.ne.jp/php_photo_20170318/20170823_list.php

print(‘

‘.’
‘.”.$result2[2].’

‘);

【2】Emotion(Azure)
http://153.126.154.106/photo_check_20170731/20170809_rank_test.php

print(‘

‘.’
‘.”.$result4[1].’

‘);

【3】Google OCR
http://153.126.154.106/OCR_20170820/20170821_list.php

print(‘

‘.’
‘.”.$result4[2].’

‘);

以上

[0310]_Google_Clouds_VisionをDB化、リスト表示する★

DB化
GoogleのClouds VisionをDB保存化してみます。
———————————-
[1]GoogleのClouds VisionをDB保存。
———————————-
DB名:visi******70821
Tables名:visi*****170821
項目:10
id
datetime
Filename
Result
Result-A
Result-B
Result-C
Result-D
Result-E
Memo
———————————-
http://dasudasu.sakura.ne.jp/php_photo_20170318
http://dasudasu.sakura.ne.jp/php_photo_20170318/20170318_pathtest.html

/////////////// DB Start

$dsn = ‘mysql:dbname=vi***************21;host=ik1-***************.ne.jp’;
$user = ‘ra*****i’;
$password = ‘Aa*****6’;

try{
$dbh = new PDO($dsn, $user, $password);

print(‘
‘);

if ($dbh == null){
print(‘接続に失敗しました。
‘);
}else{
print(‘MySQL-DB接続に成功しました。
‘);
}

//$sql = “INSERT INTO vision_t_20170821 (datetime, Filename, Memo) VALUES (now(), :fn, ‘data from 2017/08/22′)”;
//OK $sql = “INSERT INTO vision_t_20170821 (datetime, Filename, Result, Memo) VALUES (now(), :fn, :response,’data 2017/08/23′)”;
//OK $sql = “INSERT INTO vision_t_20170821 (datetime, Filename, Result, ResultA, Memo) VALUES (now(), :fn, :response, :a1z, ’13:00 2017/08/23′)”;
//OK $sql = “INSERT INTO vision_t_20170821 (datetime, Filename, Result, Result-A, Memo) VALUES (now(), :fn, :response, :a1z,’data 2017/08/23’)”;
$sql = “INSERT INTO vision_t_20170821 (datetime, Filename, Result, ResultA, ResultB, ResultC, ResultD, ResultE, Memo) VALUES (now(), :fn, :response, :a1z, :b1zzz, :c1zzz, :d1zzz, :e1zzz, ‘From 14:00 2017/08/23’)”;

echo “
“;
echo $a1z.”
“;
echo $b1zzz.”
“;
echo $c1zzz.”
“;
echo $d1zzz.”
“;
echo $e1zzz.”
“;

// 挿入する値は空のまま、SQL実行の準備をする
$stmt = $dbh->prepare($sql);

//OK $params = array(‘:fn’ => $fn, ‘:response’ => $response, ‘:a1z’ => $a1z);
//$params = array(‘:fn’ => $fn);
$params = array(‘:fn’ => $fn, ‘:response’ => $response, ‘:a1z’ => $a1z, ‘:b1zzz’ => $b1zzz, ‘:c1zzz’ => $c1zzz, ‘:d1zzz’ => $d1zzz, ‘:e1zzz’ => $e1zzz);

// 挿入する値が入った変数をexecuteにセットしてSQLを実行
$stmt->execute($params);

// 登録完了のメッセージ
echo ‘
MySQL-DB登録完了しました’;

}catch (PDOException $e){
print(‘Error:’.$e->getMessage());
die();
}

/////////////// DB End

———————————-
[2]GoogleのClouds VisionをDB検索してリスト表示
———————————-

http://dasudasu.sakura.ne.jp/php_photo_20170318/20170823_list.php
———————————-


sample

‘);

if ($dbh == null){
print(‘接続に失敗しました。
‘);
}else{
print(‘MySQL-DB接続に成功しました。
‘);
}

$sql = ‘SELECT count(*) FROM vision_t_20170821’;
$stmt = $dbh->query($sql);
$result = $stmt->fetch(PDO::FETCH_NUM);

$sql2 = ‘SELECT * FROM vision_t_20170821’;
$stmt2 = $dbh->query($sql2);

print(‘
‘);
print(‘vision_t_20170821は、全’.$result[0].”件
“);

print(‘
OCR_t_20170821テーブル全表示
‘);

?>

fetch(PDO::FETCH_NUM)){
print(‘

‘);
print(‘

‘);
print(‘

‘);
print(‘

‘);
print(‘

‘);
print(‘

‘);
print(‘

‘);
print(‘

‘);
print(‘

‘);
print(‘

‘);
print(‘

‘);
print(‘

‘);
}
?>

id datetime Filename Result ResultA ResultB ResultC ResultD ResultE Memo
‘.$result2[0].’ ‘.$result2[1].’ ‘.$result2[2].’ ‘.$result2[3].’ ‘.$result2[4].’ ‘.$result2[5].’ ‘.$result2[6].’ ‘.$result2[7].’ ‘.$result2[8].’ ‘.$result2[9].’

getMessage());
die();
}

$dbh = null;

echo ‘
MySQL-DBクローズしました’;

?>


[0309]_GoogleのAI/API_OCR結果をDB化してみる★

DB化
GoogleのClouds VisionをDBしてみます。

———————————-
GoogleのClouds VisionをDB検索してリスト表示
———————————-
[1]
GoogleのOCRの結果をDB保存
DB名:OCR_20170821
Tables名:OCR_t_20170821
項目:5
Id
Timestamp
Filename
Result
Memo

[2]GoogleのOCRをDB検索してリスト表示

———————————-

・・・・

$dsn = ‘mysql:dbname=OC**********821;host=ik1-3******16******a.ne.jp’;
$user = ‘******’;
$password = ‘A******0’;

try{
$dbh = new PDO($dsn, $user, $password);

print(‘
‘);

if ($dbh == null){
print(‘接続に失敗しました。
‘);
}else{
print(‘MySQL-DB接続に成功しました。
‘);
}

$sql = “INSERT INTO emo_list (datetime, Filename, Memo) VALUES (now(), :imageNm, ‘data from 2017/08/21’)”;

// 挿入する値は空のまま、SQL実行の準備をする
$stmt = $dbh->prepare($sql);

$params = array(‘:fn’ => $fn, ‘:ange’ => $ange1, ‘:cont’ => $cont1, ‘:disg’ => $disg1, ‘:fear’ => $fear1, ‘:ha
pp’ => $happ1, ‘:neut’ => $neut1, ‘:sadn’ => $sadn1, ‘:surp’ => $surp1);

// 挿入する値が入った変数をexecuteにセットしてSQLを実行
$stmt->execute($params);

// 登録完了のメッセージ
echo ‘
MySQL-DB登録完了しました’;

}catch (PDOException $e){
print(‘Error:’.$e->getMessage());
die();
}

———————————-
http://153.126.154.106/OCR_20170820/20170821_list.php

———————————-


sample

‘);

if ($dbh == null){
print(‘接続に失敗しました。
‘);
}else{
print(‘MySQL-DB接続に成功しました。
‘);
}

$sql2 = ‘SELECT count(*) FROM OCR_t_20170821 ‘;
$stmt2 = $dbh->query($sql2);
$result2 = $stmt2->fetch(PDO::FETCH_NUM);

$sql4 = ‘select * from OCR_t_20170821’;
$stmt4 = $dbh->query($sql4);

print(‘
‘);
print(‘OCR_t_20170821は、全’.$result2[0].”件
“);

print(‘
OCR_t_20170821テーブル全表示
‘);

?>

fetch(PDO::FETCH_NUM)){
print(‘

‘);
print(‘

‘);
print(‘

‘);
print(‘

‘);
print(‘

‘);
print(‘

‘);
}
?>

TimeStamp Filename Result Memo
‘.$result4[1].’ ‘.$result4[2].’ ‘.$result4[3].’ ‘.$result4[4].’

getMessage());
die();
}

$dbh = null;

echo ‘
MySQL-DBクローズしました’;

?>


———————————-

以上

[0308]_Google Cloud Vision APIのOCR>更にメール送信★

[0308]PHPで結果をメールで送る

PHPでメールを送る
http://qiita.com/shuntaro_tamura/items/c0ef05cb4d4e22e78297
参考

PHP ボタンが押されたら処理を実行する
https://oshiete.goo.ne.jp/qa/7842902.html
参考

PHPからHTMLへの変数の受け渡し
https://oshiete.goo.ne.jp/qa/3687318.html
参考

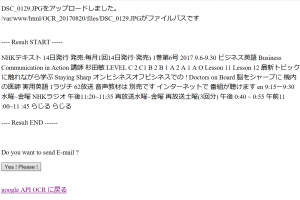
■送信元”20170820_OCR_up.php”

///// 2017/08/20 mail sendng start —-

echo “
“;
echo “

Do you want to send E-mail ?
“;

?>


‘;
print ‘
google API OCR に戻る

‘;

///// 2017/08/20 mail sending end —-

■送信先”20170820_mailyn.php”
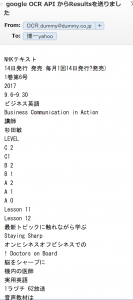
メール送付しました
“;

print ‘

‘;
print ‘
google API OCR に戻る

‘;

?>

===以下、画像====

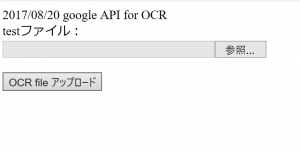
[0307]_Google Cloud Vision APIのOCR(画像認識)★

Google Cloud Vision APIのOCR(画像認識)★

Google Cloud Vision APIのOCR(画像認識)を検証する
http://qiita.com/keki/items/e5b82c6b4c28d3f00b72
参考

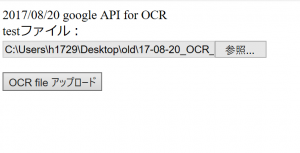
# cd /var/www/html/OCR_20170820

http://153.126.154.106/OCR_20170820/20170820_input.html

■APIキーの取得
https://console.developers.google.com/
今のKeyそのまま使えるかも・・・
AIzaSyCK*********************d87VGWc

■サンプル(拝借・・)
—————————–
20170820_test1.php
http://153.126.154.106/OCR_20170820/20170820_test1.php
—————————–
array(
array(
“image” => array(
“content” => base64_encode(file_get_contents($imageNm)),
),
“features” => array(
array(
“type” => “TEXT_DETECTION”,
“maxResults” => 10,
),
),
),
),
));

// 各種オプションを設定
$curl = curl_init();
curl_setopt($curl, CURLOPT_URL, “https://vision.googleapis.com/v1/images:annotate?key=” . $apiKey); // Google Cloud Vision APIのURLを設定
curl_setopt($curl, CURLOPT_RETURNTRANSFER, true); // curl_execの結果を文字列で取得
curl_setopt($curl, CURLOPT_SSL_VERIFYPEER, false); // サーバ証明書の検証を行わない
curl_setopt($curl, CURLOPT_CUSTOMREQUEST, “POST”); // POSTでリクエストする
curl_setopt($curl, CURLOPT_HTTPHEADER, array(“Content-Type: application/json”)); // 送信するHTTPヘッダーの設定
curl_setopt($curl, CURLOPT_TIMEOUT, 15); // タイムアウト時間の設定(秒)
curl_setopt($curl, CURLOPT_POSTFIELDS, $json); // 送信するjsonデータを設定

// curl実行
$res = curl_exec($curl);
$data = json_decode($res, true);
curl_close($curl);

// 結果を表示
print $data[“responses”][0][“fullTextAnnotation”][“text”];

—————————–
おおお!、いきなりOK!!
ありがとうございます。

さて、input.htmlとつなげるphpにしてupload.phpを作成するか・・・

http://153.126.154.106/OCR_20170820/20170820_input.html
からアクセスして引き継ぐ・・・

結果、以下
—————————–
20170820_test1.php
http://153.126.154.106/OCR_20170820/20170820_OCR_up.php
—————————–
array(
array(
“image” => array(
“content” => base64_encode(file_get_contents($imageNm)),
),
“features” => array(
array(
“type” => “TEXT_DETECTION”,
“maxResults” => 10,
),
),
),
),
));

// 各種オプションを設定
$curl = curl_init();
curl_setopt($curl, CURLOPT_URL, “https://vision.googleapis.com/v1/images:annotate?key=” . $apiKey); // Google Cloud Vision APIのURLを設定
curl_setopt($curl, CURLOPT_RETURNTRANSFER, true); // curl_execの結果を文字列で取得
curl_setopt($curl, CURLOPT_SSL_VERIFYPEER, false); // サーバ証明書の検証を行わない
curl_setopt($curl, CURLOPT_CUSTOMREQUEST, “POST”); // POSTでリクエストする
curl_setopt($curl, CURLOPT_HTTPHEADER, array(“Content-Type: application/json”)); // 送信するHTTPヘッダーの設定
curl_setopt($curl, CURLOPT_TIMEOUT, 15); // タイムアウト時間の設定(秒)
curl_setopt($curl, CURLOPT_POSTFIELDS, $json); // 送信するjsonデータを設定

// curl実行
$res = curl_exec($curl);
$data = json_decode($res, true);
curl_close($curl);

// 結果を表示
print $data[“responses”][0][“fullTextAnnotation”][“text”];

[0306]_AIvision正規化表示★

苦労しました!
以下の表示をするために、整形しました。。。。
もっと上手な方法あるだろに。。。

ーーーーーーーーーーーーーーーーー
表示例
ーーーーーーーーーーーーーーーーー

———————————-
{ “responses”: [ { “labelAnnotations”: [ { “mid”: “/m/01bqvp”, “description”: “sky”, “score”: 0.839981 }, { “mid”: “/m/05s2s”, “description”: “plant”, “score”: 0.81922907 }, { “mid”: “/m/07j7r”, “description”: “tree”, “score”: 0.7888217 }, { “mid”: “/m/07bxq”, “description”: “tourism”, “score”: 0.68298364 }, { “mid”: “/m/0lhr”, “description”: “arecales”, “score”: 0.6642025 } ] } ] }
———————————-

——-Start——
A— “description”: “sky”, “score”: 0.839981
B— “description”: “plant”, “score”: 0.81922907
C— “description”: “tree”, “score”: 0.7888217
D— “description”: “tourism”, “score”: 0.68298364
E— “description”: “arecales”, “score”: 0.6642025
——–End——-

ーーーーーーーーーーーーーーーーー
コードは、以下
ーーーーーーーーーーーーーーーーー
echo “
“;
echo “——-Start——“.”
“;

//$a = strstr($response,’,’,true);
$a = strstr($response,’,’);
$a1 = substr($a, 1);
$a1z = strstr($a1,’}’,true);
echo “A—“.$a1z.”
“;

$b = strstr($a1,'{‘);
$b1 = substr($b, 1);
$b1z = strstr($b1,’}’,true);
$b1zz = strstr($b1z,’,’);
$b1zzz = substr($b1zz, 1);
echo “B—“.$b1zzz.”
“;

$c = strstr($b1,'{‘);
$c1 = substr($c, 1);
$c1z = strstr($c1,’}’,true);
$c1zz = strstr($c1z,’,’);
$c1zzz = substr($c1zz, 1);
echo “C—“.$c1zzz.”
“;

$d = strstr($c1,'{‘);
$d1 = substr($d, 1);
$d1z = strstr($d1,’}’,true);
$d1zz = strstr($d1z,’,’);
$d1zzz = substr($d1zz, 1);
echo “D—“.$d1zzz.”
“;

$e = strstr($d1,'{‘);
$e1 = substr($e, 1);
$e1z = strstr($e1,’}’,true);
$e1zz = strstr($e1z,’,’);
$e1zzz = substr($e1zz, 1);
echo “E—“.$e1zzz.”
“;

echo “——–End——-“.”
“;

以上

[0305]_AzureMIを使ってSO件数を予測する★

AzureMIを使ってSO件数を予測する・・をやってみる
https://www.cresco.co.jp/blog/entry/795/
Azure Machine Learningでナンバーズ予測(後編)
を参考に。

まず、
https://studio.azureml.net
に入る。Sgin in here

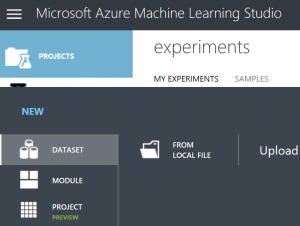
■データのアップロード
差分方式でのデータを準備したので、それを使う。
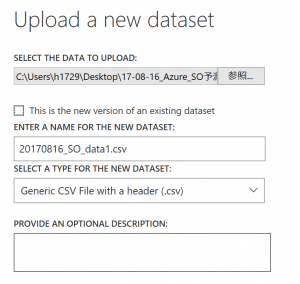
「Dataset」「from local file」へ。
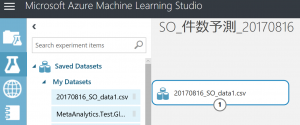
(図1)
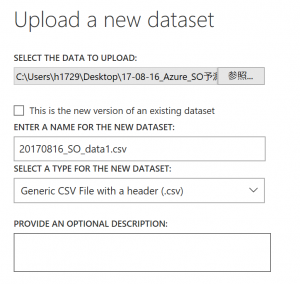
(図2)
(図3)complete
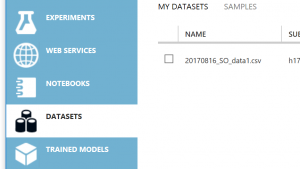
(図4)入りました!

■モデル作成、評価
Experimentsを追加する、左下「+NEW」を押下。
タイトル編集「SO_件数予測_20170816」へ。

■学習データの配置
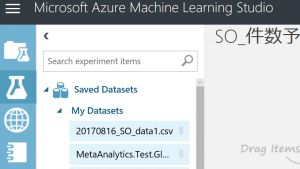
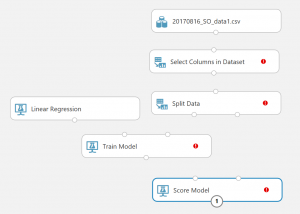
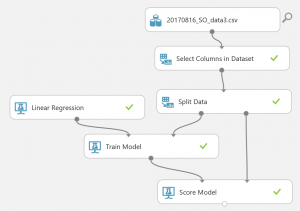
ドラッグ&ドロップで。
(図5)
(図6)

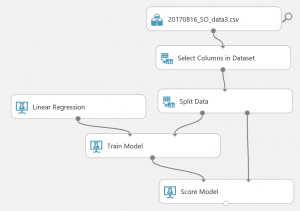
■各モジュール配置
・アルゴリズム
今回は線形回帰を指定。他のアルゴリズムや自信で開発したものなどを指定できます。
“Machine Learning > Initialize Model > Regression > Liner Regression”

・モデル
アルゴリズムと学習データによって作られる予測モデルとなります。
“Machine Learning > Train > Train Model”

・データ選択モジュール
登録したデータから予測に使用するカラムを指定します。
“Data Trasformation > Manipulation > Select Columns in Dataset”

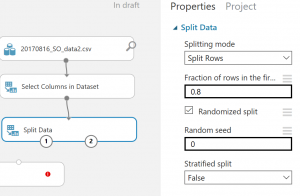
・データ分割モジュール
登録したデータを学習用、評価用に分割します。
“Data Trasformation > Sample and split > Split Data”

・スコアモジュール
予測した値の確認、評価を行います。
“Machine Learning > Score > Score Model”

習って配置・・・・
(図7)

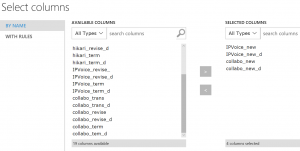
■結線とカラム選定
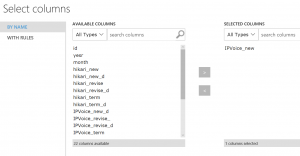
まず、IPVoice_new、collabo_new、IPVoice_new_d、collabo_new_Dを選択し予測をしてみる

Splitの設定、80%を学習データとする

Train Modelでは、IPVoice_new_dの差分を予測する。
選定は1項目しかできない。

■モデル実行
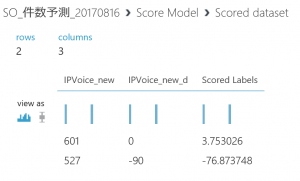
Runで実行。緑のチェックが付く。

「Score Model」でVisualizationを見る。
まあまあかな。。。
(図8)

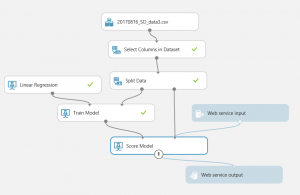
■Webサービスとして準備
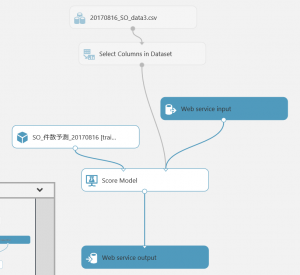
「input」「output」をドラッグ&ドロップ。
(図9)

「Score Model」 に配置、結線。
(図10)

「Run」実行。
次に更に
”Train Model”を選択してから”Predictive Web Service[Recommended]”を実行。
(勝手に動く、結線も動く)

ので、再度、結線しなおし。
(図11)

Select Columnsから、「IPVoice_new_d」は削除(用済み。。て事??)

■Webサービスの公開
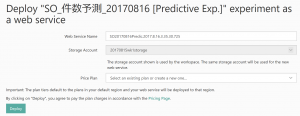
「Run」実行後、「Deploy Web Service」
更にボタンを押す
(図12)

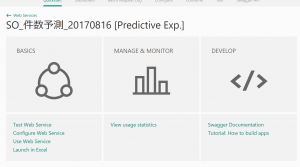
https://services.azureml.net/subscriptions/9a54705d-f1b3-482b-aea5-b2e4d065a9c8/resourceGroups/20170815_rsgroup_1/providers/Microsoft.MachineLearning/webServices/SO20170816Predic.2017.8.16.SO_prospect1/

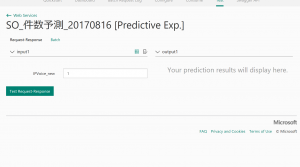
「test」をクリック
(図13)

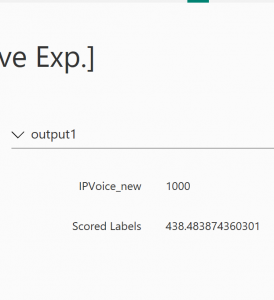
「1000」を入力してみる。
結果は・・・・
「438.483874360301」・・・と。
つまり438件多い・・・?

「500」を入力してみる。
結果は・・・・
「-106.291624502971」・・・と。
つまり106件足らず・・・?

IPVoice_new
「598」で
Scored Labels
「0.484373274230393」
だいたいこの数字なのか????

https://services.azureml.net/subscriptions/9a54705d-f1b3-482b-aea5-b2e4d065a9c8/resourceGroups/20170815_rsgroup_1/providers/Microsoft.MachineLearning/webServices/SO20170816Predic.2017.8.16.SO_prospect1/test

以上

<以下、画像・・・>